How I Built a Complete Movie Website Using ChatGPT, Claude AI and Google AI Studio — For Free
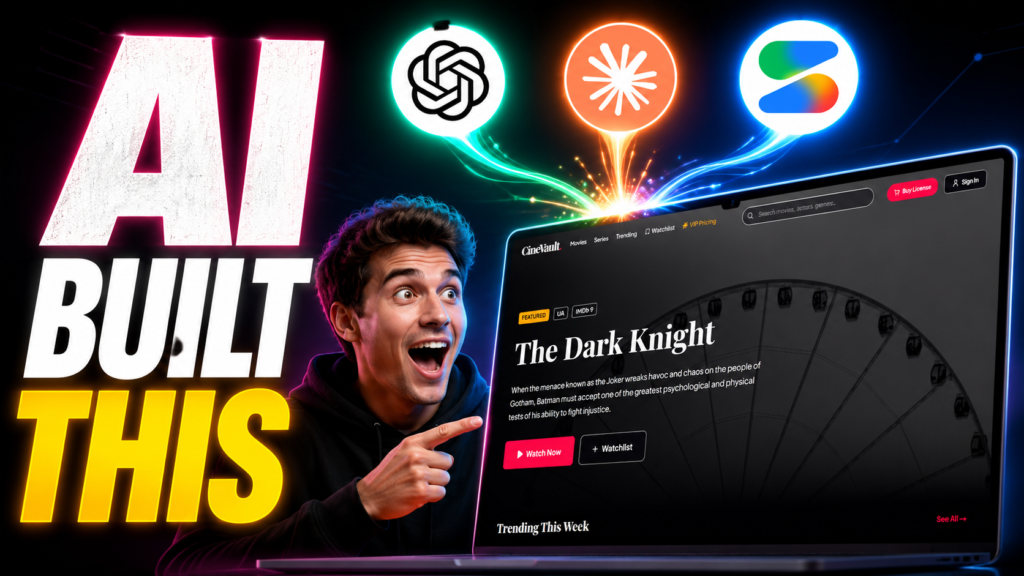
Table of Contents
- Introduction — Why I Tried Building a Movie Website with AI
- Step 1: Using ChatGPT Thinking Mode to Generate a Power Prompt
- Step 2: Claude AI with Deep Research & Deep Thinking Skills
- Step 3: Claude Built the Movie Website Blueprint (HTML File)
- Step 4: Building the Website in Google AI Studio
- Better AI IDEs for Full-Stack Movie Websites
- Step 5: Pushing to GitHub from Google AI Studio
- Step 6: Free Deployment on Vercel
- Tool Comparison Table
- My Experience: What Actually Worked
- Pro Tips Before You Start
- FAQs
- Conclusion

I genuinely wasn’t sure this would work. The idea felt a little too ambitious: build a “create movie website using Google AI Studio” workflow that chains together three different AI tools — ChatGPT for prompt generation, Claude for deep research and blueprinting, and Google AI Studio for actual code — then deploy everything live on Vercel without spending a rupee. But it did work. Sort of. I made a full YouTube video about it, and this post is where I’m dropping every prompt, every file, and the honest verdict on each tool so you don’t waste hours figuring it out yourself.
The idea came from a frustration I had with how people usually build movie websites. Most tutorials jump straight into code. Nobody talks about what to build before starting to build it. So I flipped the process: let AI do the thinking first, create a master plan, then use that plan as a blueprint for the actual code. It changed everything.
Step 1: Using ChatGPT Thinking Mode to Generate a Power Prompt
The first thing I did was open ChatGPT and select the latest available model with Thinking Mode turned on. In 2026, ChatGPT has simplified model selection — there’s now Instant, Thinking, and Pro. For tasks like this, where you need structured, in-depth output, the Thinking model is the one to use. It spends more time reasoning before it responds, and the difference in output quality is noticeable.
My goal at this stage wasn’t to build anything yet. I just wanted ChatGPT to write me a powerful prompt — one that I could then hand to another AI for deep research. This “meta-prompting” approach is something I’ve started using a lot, and it saves a huge amount of back-and-forth.
The Initial ChatGPT Prompt
Here’s what I typed first to set the context (originally written in Gujarati, translated here for you):
I want to create a website that is attractive and beautiful, with CSS and design. It should be like a movie website — with all necessary pages, deep research on required features, good CSS animations, online video watching capability, a well-arranged video player, and all the most necessary features. Conduct deep research and analysis and provide me the plan. Today, based on my idea, write me a well-structured prompt so I can get a good plan written by running online research through an AI. Write me a good prompt in a structured format.
(Model used: ChatGPT Thinking Mode, latest free model)
ChatGPT responded with a decent prompt, but then asked at the bottom: “Do you want a more powerful version?” Obviously I said yes.
The Powerful Version Prompt — Full English (Copy This)
This is the complete prompt ChatGPT generated in Thinking Mode. It’s long, it’s detailed, and it’s exactly what you need to give to an AI coding agent or a deep-research AI to create a movie website the right way:
ROLE: You are a world-class team consisting of a Senior Product Manager, Movie Streaming Platform Architect, UX/UI Design Expert, Senior Frontend Developer, Senior Backend Developer, SEO Expert, Growth Strategist, Performance Optimization Expert, Security Consultant, and OTT Platform Consultant.
Your task is to perform deep research, analysis, benchmarking, and planning for a modern movie website project.
PROJECT VISION: I want to build a professional movie website with a premium cinematic experience. The website should feel modern, beautiful, highly engaging, fast, responsive, and visually impressive. The platform should provide an experience similar to modern entertainment and streaming websites while maintaining a unique identity. Do not give generic answers. Think like a senior product team designing a real production-ready platform.
PHASE 1 — MARKET & COMPETITOR RESEARCH: Research and analyze Netflix, Disney+, Prime Video, Hulu, Max, Crunchyroll, IMDb, Letterboxd, and Rotten Tomatoes. For each, identify strengths, weaknesses, best UI/UX ideas, feature opportunities, what users love, and what users complain about. Then explain which ideas should be adopted in my platform.
PHASE 2 — PRODUCT STRATEGY: Define target audience, user personas, user goals, business goals, unique selling proposition, and competitive advantage. Explain how the website can stand out from competitors.
PHASE 3 — COMPLETE FEATURE DISCOVERY: Identify every important feature a modern movie website may require. Separate into Core Features, Advanced Features, Premium Features, and Future Features. Include movie browsing, categories, genres, search, filters, recommendations, trending, watchlist, user profiles, ratings, reviews, comments, video streaming, quality selection, subtitles, multi-language support, actor pages, director pages, recommendation engine, AI features, admin features, and analytics features.
PHASE 4 — COMPLETE PAGE STRUCTURE: Create a complete sitemap including all Public Pages (Home, Movies, Series, Categories, Genres, Search, Movie Details, Actor Profile, Director Profile, Reviews, About, Contact, Privacy Policy, Terms), User Pages (Login, Register, Forgot Password, Dashboard, Profile, Watchlist, Favorites, History, Notifications, Settings), and Admin Pages (Dashboard, Movies Management, Users Management, Reviews Management, Analytics, Subscription Management, Ads Management, System Settings).
PHASE 5 — UI/UX DESIGN SYSTEM: Create a premium cinematic design system. Define Color Palette, Typography, Spacing System, Design Tokens, Shadows, Cards, Buttons, Inputs, Navigation, and Layout System. Suggest Dark Theme, Glassmorphism, Cinematic Effects, and Motion Design. Explain how to make users stay longer on the platform.
PHASE 6 — HOMEPAGE ARCHITECTURE: Design the ideal homepage including Hero Section, Featured Movies, Trending Movies, Latest Releases, Popular Categories, Top Rated, Recommended, Continue Watching, Upcoming Movies, Newsletter, and Footer.
PHASE 7 — MOVIE DETAIL PAGE: Design the perfect movie detail page with Trailer, Poster, Banner, Synopsis, Cast, Crew, Ratings, Reviews, Similar Movies, Watch Button, Watchlist Button, Share Button, and Comments.
PHASE 8 — VIDEO PLAYER EXPERIENCE: Design a professional OTT-style video player with Adaptive Streaming, Fullscreen, Theater Mode, Mini Player, Playback Speed, Quality Selection, Subtitle Support, Audio Tracks, Continue Watching, and Keyboard Shortcuts.
PHASE 9 — ANIMATIONS & VISUAL EFFECTS: Suggest premium animations including Page Transitions, Hover Effects, Scroll Animations, Card Animations, Hero Effects, Skeleton Loading, and Micro-interactions.
PHASE 10 — SEO STRATEGY: Create a complete SEO strategy with Technical SEO, On-page SEO, Schema Markup, Movie Schema, Review Schema, Sitemap, Internal Linking, and Performance Optimization.
PHASE 11 — SECURITY: Create a security architecture covering Authentication, Authorization, JWT, Session Management, Rate Limiting, API Security, Content Protection, and Anti-Abuse Systems.
PHASE 12 — TECHNOLOGY STACK: Recommend the best stack for Frontend, Backend, Database, Video Streaming, Authentication, Hosting, CDN, Analytics, and Monitoring. Explain pros and cons.
PHASE 13 — DEVELOPMENT ROADMAP: Create a development roadmap with Phase 1 (MVP), Phase 2 (Advanced), Phase 3 (Premium), and Phase 4 (Scaling). Estimate complexity and priorities.
PHASE 14 — MONETIZATION: Suggest all monetization models including Ads, Premium Membership, Subscription, Freemium, Sponsorships, and Affiliate Revenue.
PHASE 15 — FINAL DELIVERABLE: Provide an Executive Summary, Complete Feature Matrix, Complete Sitemap, UI/UX Blueprint, Database Overview, API Overview, Development Roadmap, Scaling Plan, Monetization Plan, and Final Recommendations. The final output must be extremely detailed, practical, production-ready, and suitable for real-world implementation.
That’s the prompt. Save it. It took me a few tries to get to this version, but once I had it, the next step is where things got really interesting.
Step 2: Taking the Prompt to Claude AI with Custom Skills
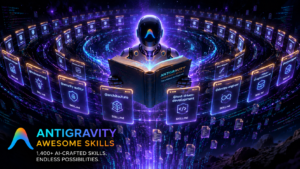
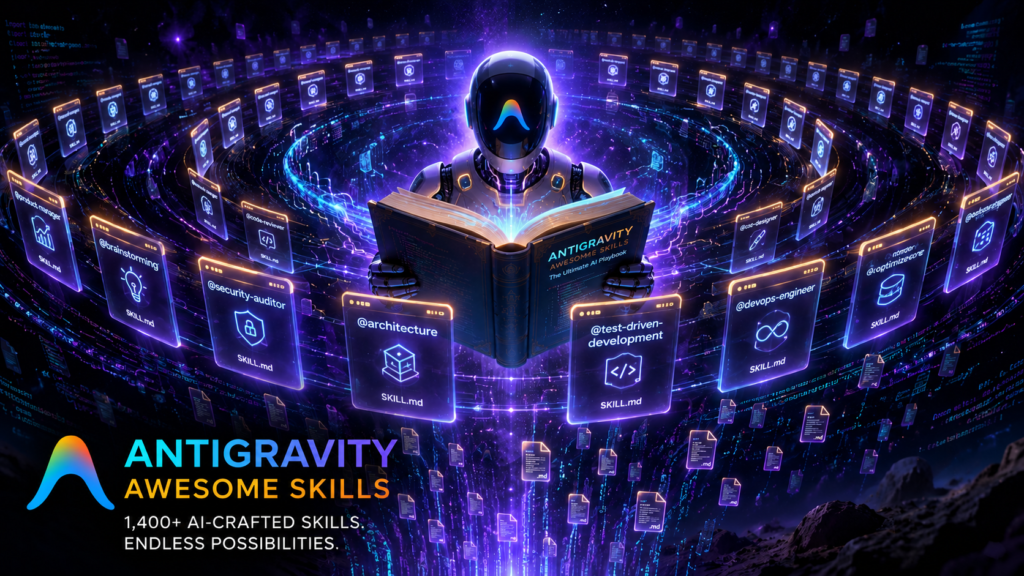
Once I had the ChatGPT-generated prompt, I opened Claude.ai. Before pasting anything, I added two custom skills I’d built myself: Deep Research and Deep Thinking. These skills are essentially instruction files that tell Claude how to approach a task — how deep to go with web searches, what frameworks to use when analyzing a problem, and how to structure the output.
What Are Claude Skills and Why They Matter
Claude Skills are reusable instruction sets you can load into Claude to guide its behavior on specific types of tasks. Think of them like a system prompt that stays active across a session. I made videos about both skills on my YouTube channel (links in the description), and the short version is: the Deep Research skill forces Claude to run 5–12 web searches from different angles before answering, while the Deep Thinking skill pushes it through multiple analysis frameworks before forming any conclusion.
Without these skills, Claude gives you a decent answer. With them, it gives you a research-grade answer. The difference in the movie website blueprint output was massive.
I also set the model to the latest Claude version with Extended Thinking turned on and effort set to Max. That combination — good prompt + custom skills + max thinking — is what produced the detailed HTML blueprint in one shot.
The Claude Prompt I Used (Copy This)
— [Paste the full ChatGPT power prompt above here] —
/deep-research /deep-thinking
Hello Claude, please do deep research on this movie website plan. Based on the framework provided above, I need to build a movie website — specifically a movie downloading and streaming website where visitors can also watch content online, view and stream movies. Considering how a proper movie website should be structured, what is needed to build it, research all of this online and write me a detailed plan. Write a deep plan in full detail. Use deep thinking and deep analysis, and provide me a complete plan with good design effects and animations.
(Model: Latest Claude — Extended Thinking ON, Effort: Max)
After hitting enter, I waited. Claude ran the research, processed the prompt through both skills, and delivered a comprehensive HTML file — a full master blueprint for the movie website from start to end.
Download: Deep Research & Deep Thinking Claude Skills
I mentioned in the video that I’d make the skills available here. Both files are SKILL.md files you can load into Claude.ai or Claude Code. Add them under your skills settings using the “/” path format.
Skill 1 — Deep Research:
[Deep Research Skill — Download Link]
Skill 2 — Deep Thinking:
[Deep Thinking Skill — Download Link]
If you’ve seen my previous videos about building these skills, you already have them. If not, the download links above will get you there — and you can also check the video description for the direct YouTube video links.
Step 3: Claude Built the Movie Website Master Blueprint
The output Claude gave me was an HTML file — not a website, but a detailed structured blueprint formatted as a webpage so it’s easy to read and navigate. It covered everything from page structure, color system, tech stack recommendations, sitemap, to the complete feature list broken down by priority. Think of it as the architect’s drawing before the builders arrive.
I downloaded that HTML file and it became the “source of truth” for the next step. Everything that goes into the Google AI Studio prompt is based on what’s in that file.
Download: Movie Website Master Blueprint (HTML)
This is the complete AI-generated blueprint file that Claude produced — the full planning document for a movie downloading and streaming website.
Movie Website Blueprint:
[Movie Website Blueprint — Download Link]
The file is available in the YouTube video description as well. Download it, open it in any browser, and you’ll see the full structured plan Claude created.
Step 4: Building the Website in Google AI Studio
With the blueprint downloaded, I opened Google AI Studio and went to the Build tab. Build mode is where Google AI Studio lets you describe an app in plain language (or upload a file) and have Gemini generate the code for it. As of March 2026, Google upgraded this significantly — it now handles React and Angular projects, integrates with Firebase for backend needs, and can push directly to GitHub.
I uploaded the blueprint HTML file and gave Claude’s plan as context. Then I typed my prompt.
The Google AI Studio Prompt I Used
Here’s the HTML file that contains the full plan. Based on the plan, create my complete movie website. You must do a complete analysis of the plan — read it thoroughly and work according to the plan. Do not add anything that is not in the plan, and do not skip anything that is in the plan. Every time you access the plan, re-read it and then check the website you’ve built and make improvements. Scan the plan carefully and implement it to build my movie website. You may also do in-depth research for it. Provide me with good output through deep thinking and deep analysis.
(File attached: Movie Website Blueprint HTML)
My Experience with Google AI Studio — Honest Rating: 4.5 / 10
I want to be straight with you here: Google AI Studio Build mode is not the right tool if you want to create a full movie website with a real backend, authentication, database, and video player logic. It works well for landing pages and frontend demos. It struggled with anything that needed actual full-stack architecture.
The frontend it generated looked decent — decent being the key word. But the more complex the plan, the more it fell apart. Buttons didn’t always wire up. The video section was essentially a placeholder. It couldn’t handle the backend pieces at all without Firebase configuration that I’d have to set up separately.
For this specific use case, I’m giving it 4.5 out of 10. It earns its marks for being free, fast, and genuinely impressive for simple apps. But a movie website with a full feature set? You need something more powerful.
Better AI IDEs for a Full-Stack Movie Website
If you want to actually build out the movie website — not just a demo — here are two tools I recommend instead. Both have free tiers that give you real weekly access to powerful models.
Google Antigravity IDE: Google’s own agent-first desktop IDE. It runs multiple agents in parallel across your editor, terminal, and browser simultaneously. It’s currently in public preview, free to try with rate limits, and connects directly to the Google Cloud ecosystem. For building React or Next.js apps with Firebase backends, it’s far more capable than the browser-based Build mode. [Google Antigravity — See dedicated video in description]
Amazon Kiro IDE: AWS’s spec-driven AI coding tool. You write structured requirements — called specs — and Kiro works through them methodically with its own agent. It uses Claude models on paid tiers, and DeepSeek on the free tier. Free access gives you 50 credits to start. For a project with a detailed plan like the one Claude produced, Kiro’s spec-driven workflow fits naturally. [Kiro IDE — See dedicated video in description]
Both tools are covered in separate dedicated videos on my channel. Links are in the description. For the purposes of this video, I used Google AI Studio as a demo to show what it can and can’t do — not as a recommendation for production work.
Step 5: Pushing the Website to GitHub
Once Google AI Studio generated the code, I went to the settings area inside Build mode and connected my GitHub account. From there, you authenticate your GitHub account, and Google AI Studio will push all your project files to a new repository for you.
A few things to keep in mind here. First, review all the generated files before committing — click through each one and check for anything obviously broken. Second, decide whether you want the repository to be public or private before you commit. Third, the repository name matters more than it seems, because Vercel will use it to generate your deployment URL. Name it something close to the domain you’ll eventually want.
Once everything looks good, commit the files. Your GitHub repository link appears, and you’re ready for the last step.
Step 6: Free Deployment on Vercel — No Credit Card Needed
I used Vercel to deploy rather than Google Cloud Run. The reason is simple: Google’s direct deploy option charges real money once your traffic picks up, and the pricing structure makes it expensive for early-stage projects. Vercel’s Hobby plan is free with no credit card required, gives you a live HTTPS URL immediately, and auto-deploys every time you push new code to GitHub.
Here’s the deployment process:
- Go to vercel.com and sign up (use your GitHub account for the quickest setup).
- Click New Project.
- Connect your GitHub account and select Only the specific repository — not all repositories. Choose the one Google AI Studio created.
- Click Import.
- On the settings page, confirm your project name. This name becomes your URL —
your-project-name.vercel.app. If someone else already has that name on Vercel, it will add random characters to your URL. So pick something unique and specific. - If you have environment variables (API keys, etc.), add them here. For this demo I didn’t have any, so I skipped it.
- Click Deploy.
Build time takes 30–90 seconds. You might see some warnings — that’s normal, ignore them. If you see actual errors (red text, build failed), copy the error message, go back into Google AI Studio’s Build chat, paste the error, and ask it to fix the code. Then push the fix to GitHub, and Vercel will automatically redeploy.
In my case, one warning appeared and the build completed successfully. After the congratulations screen appeared, I clicked Add Domain to edit the URL to something cleaner. And that was it — the movie website was live.
Tool Comparison Table
| Tool | Best For | Free Tier | My Rating |
|---|---|---|---|
| ChatGPT (Thinking Mode) | Generating structured, detailed prompts | Yes (GPT-5.3 Instant) | 8 / 10 |
| Claude AI (+ Skills) | Deep research, planning, blueprinting | Yes (limited messages) | 9 / 10 |
| Google AI Studio (Build) | Frontend landing pages, demos | Yes (rate limited) | 4.5 / 10 |
| Google Antigravity IDE | Full-stack React/Next.js apps | Yes (weekly limits) | 8.5 / 10 |
| Amazon Kiro IDE | Spec-driven full-stack development | Yes (50 free credits) | 8 / 10 |
| Vercel | Free frontend deployment + GitHub CI | Yes (Hobby plan, no card) | 9.5 / 10 |
My Experience: What I Learned From This Entire Process
The most valuable thing this experiment confirmed is that planning beats coding. The Claude blueprint was so detailed that every subsequent step became easier. When I gave Google AI Studio a vague request, the output was vague. When I gave it a 15-phase structured plan, it actually tried to follow it — even if the execution wasn’t perfect.
The second thing I learned: don’t use one AI for everything. ChatGPT’s Thinking Mode is better at meta-tasks like “write me a prompt that another AI can use.” Claude with skills is better at in-depth research and structured output. Google AI Studio Build is better as a fast prototyper, not a full project builder. Each tool has a lane.
The third thing — and this caught me off guard — was how well the Claude skills performed. I’ve built custom deep-research and deep-thinking skills for my own workflow, and using them in a context like “create a movie website plan” showed me that the skills don’t just help with pure research questions. They also dramatically improve creative and technical planning tasks. The blueprint Claude produced with those skills active was substantially better than what I got without them.
If I were starting from scratch today, the workflow I’d use is: ChatGPT (Thinking Mode) for prompt generation → Claude with skills for the master plan → Google Antigravity or Kiro for actual development → Vercel for deployment. That pipeline would get you a genuinely functional movie website, not just a demo.
Pro Tips Before You Start Building Your Own Movie Website
- Always use the latest model with reasoning/thinking mode active for planning tasks. The output quality difference is not subtle.
- When uploading the blueprint to Google AI Studio, keep your initial prompt tight. Tell it to stick to the plan — AI Studio can drift if you give it too much creative freedom.
- After the website is generated, do a full visual walk-through as if you’re a first-time visitor. Click every button. Check every section. Screenshot any broken elements and paste them back into the AI chat with a “fix this” prompt.
- Name your GitHub repository and Vercel project with your target domain name from day one. Changing it later is possible but adds extra steps.
- If you see errors during Vercel deployment, don’t panic. Copy the exact error text, go back to whichever AI coding tool you used, explain “I got this error when deploying to Vercel” and paste the error. Nine times out of ten, it fixes itself in one message.
- For a movie website that needs a real database and user authentication, use Google Antigravity or Kiro. They handle backend logic that Google AI Studio Build mode currently doesn’t support well.
Frequently Asked Questions
Can I really create a movie website using Google AI Studio for free?
Yes, you can create a functional movie website frontend using Google AI Studio Build mode at no cost. The free tier has rate limits, but for a project of this scope you’ll likely stay within them. However, for a full-stack website with a backend, you’ll need either Google Antigravity, Kiro IDE, or manual backend setup.
What’s the difference between Google AI Studio and Google Antigravity IDE?
Google AI Studio is browser-based and primarily useful for rapid frontend prototyping. Google Antigravity is a downloadable desktop IDE with multi-agent orchestration, terminal access, and full support for React, Next.js, and backend services. Antigravity is what you use when you want to create a movie website that actually works end-to-end.
Do I need coding knowledge to follow this process?
Not much. If you can copy-paste and follow a step-by-step guide, you can do this. The AI does the actual code generation. What you need is the patience to review what the AI builds and the willingness to give feedback when something looks wrong.
What is Kiro IDE and is it better than Google AI Studio for this kind of project?
Amazon Kiro is a standalone AI coding IDE that works through structured specs — you define requirements, designs, and tasks, and the AI works through them systematically. For a project where you already have a detailed plan (like the Claude-generated blueprint), Kiro’s spec-driven approach fits naturally. It handles full-stack development better than Google AI Studio Build mode. You can learn more from the dedicated Kiro video linked in the description.
Why did you use Vercel instead of deploying directly from Google AI Studio?
Google’s direct deployment option goes to Cloud Run, which charges money based on usage and traffic. Vercel’s Hobby plan is genuinely free with no credit card required, auto-deploys on every GitHub push, and gives you a clean public URL instantly. For early-stage projects, Vercel is the obvious choice.
Where can I get the Claude Deep Research and Deep Thinking skills?
Both skill files are available to download from the links in the download section above and also in my YouTube video description. I’ve made dedicated videos about building and using both skills — those links are in the description as well.
Can I use this same approach to create other types of websites, not just movie websites?
Absolutely. The core workflow — ChatGPT for meta-prompting, Claude with skills for deep planning, Google AI Studio or Antigravity for building, Vercel for deployment — works for any type of web project. Swap out “movie website” for whatever you’re building and the process stays the same.
Conclusion — Go Build Something
The honest takeaway from this experiment: to create a movie website using Google AI Studio is possible, but Google AI Studio alone isn’t enough if you want something production-ready. The real value I found was in the full pipeline — using each AI tool for what it’s actually good at.
ChatGPT Thinking Mode for writing prompts. Claude with Deep Research and Deep Thinking skills for the master plan. Google AI Studio for a quick prototype. Google Antigravity or Kiro when you’re ready to build the real thing. And Vercel to put it all online for free.
The prompts are above, the skill files and blueprint are available for download, and if you run into trouble at any step, drop a comment on the video. I’ll help where I can.
Now go build something.