
How to Connect WordPress MCP to Google Antigravity 2.0: Best Easy Guide

How to Easily Connect WordPress MCP to Google Antigravity 2.0 — Complete Step-by-Step Guide (2026)
If you run a WordPress site and you’ve been trying to figure out whether Google Antigravity 2.0 can actually manage your content for you — yes, it can. I know, because I spent an entire week getting this to work, hitting every error message in the book, and eventually building a setup that lets an AI agent create posts, generate Elementor layouts, and even schedule content publishing automatically.
Here’s the short version: Google Antigravity 2.0 connects to WordPress through a standard called the Model Context Protocol (MCP). Once that bridge is in place, your AI agent has real, live access to your site. It can create and edit posts, manage pages, handle media, moderate comments, and control site settings — all without you touching the WordPress dashboard.
This guide covers the full setup from scratch. It’s updated for July 2026 and written specifically for the Antigravity 2.0 interface — not the older 1.x IDE that most guides are still describing. I’ve also added a troubleshooting section — something no other guide on how to connect WordPress MCP to Google Antigravity 2.0 currently covers, because the error messages you’ll hit are genuinely confusing without context.
What Is Google Antigravity 2.0?
Google Antigravity started as a VS Code fork in November 2025 — basically GitHub Copilot with a more aggressive agent setup. Then Google I/O 2026 happened, and everything changed.
Google Antigravity 2.0, which shipped May 19, 2026, is now a standalone desktop application. It’s not an IDE in the traditional sense. Think of it as a mission control center for AI agents. You describe what you want built, and multiple specialized sub-agents work on it simultaneously — one writing code, another running tests, another verifying the output in an actual Chrome browser.
For WordPress users, what matters is this: Antigravity 2.0 has a real, production-grade MCP implementation, a searchable MCP Store with pre-built server configs, and — critically — all your MCP settings sync across every surface (the desktop app, the IDE, and the CLI) through a single shared config file. You configure it once, and it works everywhere.
What Changed in Version 2.0?
The 2.0 release added several features that are directly relevant to WordPress workflows:
- Scheduled Tasks — Set cron-style prompts that agents run automatically on a schedule, no manual input required. More on this later.
- Dynamic Subagents — The main agent can spawn specialized child agents mid-task to parallelize complex jobs.
- Browser Subagent — A real Chrome instance that clicks through your site and takes screenshots during development. Use the
/browsercommand to activate it. - Unified MCP Config — All Antigravity surfaces now share one config at
~/.gemini/config/mcp_config.json, so WordPress MCP works from the desktop app, IDE, and CLI simultaneously. - Agy CLI — A Go-based terminal interface that replaced Gemini CLI. It’s significantly faster and syncs preferences with the desktop app bidirectionally.
Which AI Models Does It Support?
Antigravity 2.0 is genuinely multi-model. Depending on your plan, you get access to:
- Gemini 3.1 Pro — Google’s flagship model, best for complex tasks
- Gemini Flash variants — Faster and cheaper; “Google Antigravity free plan WordPress” users will mostly be on Flash
- Claude Sonnet 4.6 and Claude Opus 4.6 — Strong for reasoning-heavy writing tasks
- GPT-OSS-120B — Available on paid plans
One practical note: heavier models eat more quota. If you’re on the free tier and doing WordPress automation, stick to Gemini Flash until you know your workflow works, then consider upgrading.
What Is WordPress MCP?
MCP stands for Model Context Protocol — an open standard developed to let AI agents communicate with external tools and services in a structured, secure way. Think of it as an API adapter layer specifically designed for AI.
When you install the “WordPress MCP Adapter Plugin” on your site, your WordPress installation exposes a standardized endpoint — something like https://yoursite.com/wp-json/mcp/mcp-adapter-default-server — that AI agents can call to perform actions. Those actions include everything WordPress’s REST API supports: creating posts, updating pages, managing taxonomy, uploading media, reading site settings, and more.
The important thing to understand is that WordPress MCP does not give the AI direct database access. It acts through WordPress’s own authentication system using an Application Password, which means the AI can only do what a logged-in user with the same permissions could do. That’s actually a good security design choice.
Think of it this way: you’re giving Google Antigravity 2.0 a set of keys to your WordPress house. The agent can open doors, rearrange furniture, and add new rooms — but it still has to follow the house rules.
Why Connect WordPress MCP to Google Antigravity 2.0?
You might be wondering if this is actually worth the setup time. Here’s what you can do once the WordPress MCP integration with Antigravity is running:
- Generate and publish blog posts — Describe a topic, let the agent research, write, format, and publish it directly to your site.
- Create Elementor page layouts from a text prompt — Type “Create a homepage for a digital marketing agency” and the agent builds it out automatically.
- Automate repetitive content tasks — Updating category descriptions, adding ALT text to images, cleaning up old drafts — all handled by the agent.
- Scheduled auto-publishing — Set up a weekly content agent that runs every Monday morning, generates a post, and publishes it while you sleep. (This uses Antigravity 2.0’s new Scheduled Tasks feature.)
- AI-powered SEO cleanup — The agent can audit your existing posts, identify missing meta descriptions, and fix them across the board.
- Comment moderation at scale — Tell the agent to approve legitimate comments and trash spam across your entire content library.
If you also use Claude AI alongside Antigravity, our guide on Connecting Claude AI to WordPress & YouTube via MCP covers a parallel setup that works well alongside this one.
None of this requires you to write a single line of code. The “vibe coding WordPress no PHP” dream that developers have been talking about since early 2026 is real — if you’re willing to put in the 30-minute setup this guide covers.
Pricing Guide — Which Plan Do You Actually Need?
This is where I want to be straight with you, because the pricing situation around Google Antigravity is genuinely confusing in 2026.
When Antigravity launched in November 2025, the free tier gave you 250 agent requests per day. By December 2025, that was cut to 20. Then Google introduced a credit system in March 2026, switched Pro users from 5-hour to weekly quota refreshes, and created what the developer community started calling the “168-hour lockout” problem — where Pro users found themselves completely locked out for seven days after hitting their weekly cap.
Things have improved since then. Post-Google I/O, the pricing was restructured, and the free tier at least works reliably for small-scale WordPress work. But you need to go in with clear expectations.
Here’s a practical breakdown:
Antigravity Plans at a Glance
| Plan | Price | Daily / Weekly Requests | Best For | WordPress MCP Verdict |
|---|---|---|---|---|
| Free (Individual) | $0/month | ~20/day (Gemini Flash), 5-hr refresh | Testing, learning the setup | Enough to try the integration; not for daily use |
| AI Pro | $20/month | Higher limits, weekly refresh cap | Regular WordPress content work | Recommended for serious WordPress automation |
| AI Ultra | $100/month | Highest limits, Gemini 3.1 Pro priority | Agency workflows, high-volume content | Overkill for most; ideal for WooCommerce + multi-site |
| AI Credits | $25 for 2,500 credits ($0.01 each) | Pay-per-use overage system | Bursting past plan limits | Enable “AI Credit Overages: Always” to avoid lockouts |
Practical advice for anyone trying to connect WordPress MCP to Google Antigravity 2.0: Start on the free tier to verify the integration works. If you’re doing this for a real site, get AI Pro. The 168-hour lockout issue that hurt early adopters was partially addressed in recent updates, but buying a small credit buffer ($25 worth) is still a smart hedge against hitting the weekly cap mid-project.
One more thing worth knowing: “Google Antigravity free plan WordPress” setups still have access to all AI models including Gemini 3.1 Pro — just with tighter rate limits. Free doesn’t mean Gemini Flash only.
Requirements Before You Begin
Before you connect WordPress MCP to Google Antigravity 2.0, make sure you have everything on this checklist:
- ✅ A self-hosted WordPress site (WordPress.com does not support this setup)
- ✅ HTTPS enabled on your WordPress site — MCP connections require SSL. If your site is still on HTTP, update it first.
- ✅ WordPress admin access (you need to install plugins and create Application Passwords)
- ✅ Google Antigravity 2.0 installed on your computer — download from antigravity.google
- ✅ A Google account signed into Antigravity (personal Gmail is fine for the free tier)
- ✅ Node.js 18+ installed on your machine — required for the MCP bridge to run
- ✅ Optional: Elementor installed on WordPress if you want AI layout generation
If you’re missing Node.js, grab it from nodejs.org before proceeding. The MCP config uses npx to run the WordPress bridge, and it won’t work without it.
Step-by-Step: How to Connect WordPress MCP to Google Antigravity 2.0
Step 1 — Install the Required WordPress Plugins
You need two plugins on your WordPress site to expose the MCP endpoint. The cleanest option in 2026 is the WSP WordPress MCP Plugin — it handles both the MCP server endpoint and the Antigravity-specific config generation in one package. You no longer need a separate MCP Adapter plugin if you’re using WSP v2.2+.
- Log into your WordPress dashboard
- Go to Plugins → Add New
- Search for “WSP WordPress MCP” or upload the ZIP if you downloaded it directly
- Click Install Now, then Activate
After activation, you’ll see a new MCP menu item appear in your WordPress dashboard sidebar.
Note on older setups: Some tutorials still show the two-plugin method (MCP Adapter + WSP). That works too, but WSP’s native endpoint is simpler and the new “MCP Adapter Plugin” legacy path was removed in WSP v2.2. If you’re starting fresh, stick with the single-plugin approach.
Step 2 — Generate a WordPress Application Password
This is the credential Antigravity will use to authenticate with your site. WordPress’s Application Passwords are more secure than your main login password — they can be revoked independently, and they follow a specific format.
- In your WordPress dashboard, go to Users → All Users
- Click on your admin account username
- Scroll down to the Application Passwords section
- In the “New Application Password Name” field, type something like Antigravity MCP
- Click Add New Application Password
- WordPress will display the password exactly once (official Application Passwords docs) — it looks like
xxxx xxxx xxxx xxxx xxxx xxxx(24 characters with spaces)
⚠️ Copy this immediately and paste it somewhere safe. WordPress won’t show it again after you leave the page. If you lose it, you’ll need to generate a new one.
Keep the spaces in the password when you paste it into the config. This is a common mistake — the “WordPress MCP application password” format includes spaces between character groups, and removing them will cause authentication errors.
Step 3 — Open Antigravity 2.0 and Find MCP Settings
The MCP setup location changed between Antigravity 1.x and 2.0, so if you’ve seen older tutorials, this part looks different.
In Antigravity 2.0 (the standalone desktop app):
- Open the Antigravity 2.0 application
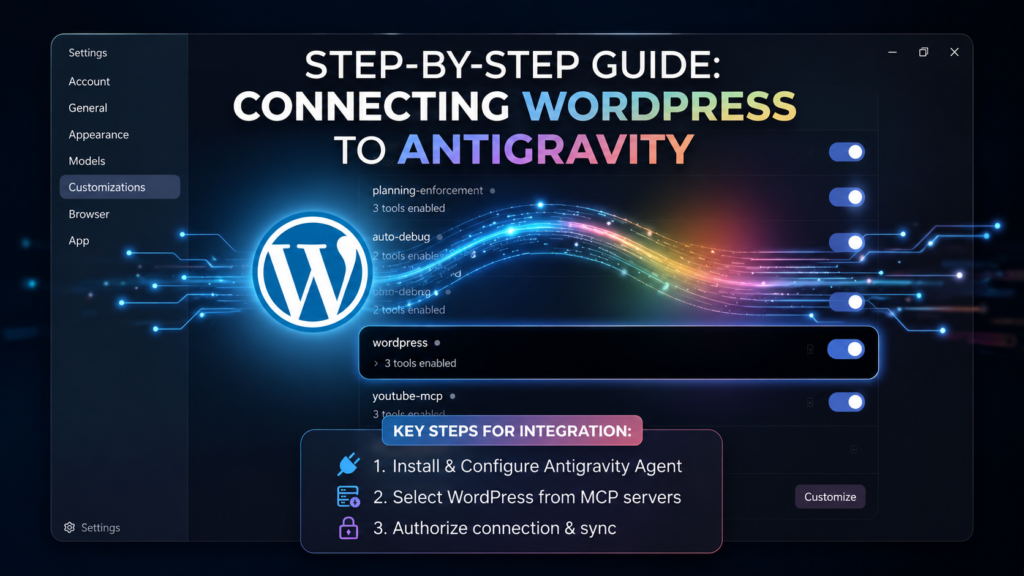
- Click the Settings button at the bottom left of the screen
- Select Customizations
- Scroll to find the Installed MCP Servers section
- Click Add MCP — this opens the MCP Store
You can search the MCP Store for WordPress-specific servers here. Alternatively, click View Raw Config to paste a JSON config directly (which is what Step 5 covers).
If you’re using the Antigravity IDE instead: Open the sidebar, find your Agent, click the three-dot menu (⋮), select MCP Servers → Manage MCP Servers, then click View Raw Config.
Step 4 — Get Your MCP Config from the Plugin
Here’s where the new WSP plugin makes things much easier. If you plan to add more than one MCP server to Antigravity (recommended), read our complete guide to adding multiple MCP servers in Google Antigravity alongside this one. Instead of hand-writing a JSON config, the plugin generates it for you:
- In your WordPress dashboard, go to MCP → Connection
- Find the Antigravity tab in the client config section
- The plugin auto-fills the endpoint URL and API key
- Click Copy to grab the ready-to-paste config snippet
The config will look something like this:
{
  "mcpServers": {
    "wordpress": {
      "command": "npx",
      "args": [
        "-y",
        "@automattic/mcp-wordpress-remote@latest"
      ],
      "env": {
        "WP_API_URL": "https://yoursite.com/wp-json/mcp/mcp-adapter-default-server",
        "WP_API_USERNAME": "your_wordpress_username",
        "WP_API_PASSWORD": "xxxx xxxx xxxx xxxx xxxx xxxx"
      }
    }
  }
}
The plugin replaces yoursite.com with your actual domain, and the API key is pre-filled. You just need to add your WordPress username and the Application Password you generated in Step 2.
Step 5 — Paste the Config into Antigravity
- Back in Antigravity 2.0, click View Raw Config in the MCP settings
- You’ll see the current MCP config file (likely empty or with any previously added servers)
- Paste your WordPress MCP config into the appropriate section of the JSON
- Make sure the JSON structure is valid — if you have other MCP servers already configured, add
wordpressas another entry inside themcpServersobject - Save the config
Antigravity 2.0 stores this config at ~/.gemini/config/mcp_config.json on your system. Changes made through the UI write to this same file, and the config is shared across the desktop app, IDE, and CLI.
Step 6 — Restart and Test the Connection
- Close Antigravity 2.0 completely
- Reopen it
- Go to Settings → Customizations → Installed MCP Servers
- You should now see WordPress listed with a green indicator
To verify the connection is working, open your browser and visit https://yoursite.com/wp-json/mcp/. You should see a JSON response listing available MCP namespaces. If you get a 404, double-check the plugin is activated and your site uses HTTPS.
Step 7 — Run Your First WordPress Agent Prompt
Now the real fun starts. Open an agent session in Antigravity 2.0 and try a simple test:
List all published posts on my WordPress site and show me the title and URL of each one.If the connection is working, the agent will call your WordPress MCP server and return a list of your actual posts. That’s the moment it clicks — you’re talking to your live site through plain English.
Once that works, try something more useful:
Create a new draft blog post titled "10 Things Every Small Business Owner Should Know About AI in 2026" with an introduction paragraph and 10 subheadings. Set the category to "Business Tips".The agent will write the post and push it to your WordPress site as a draft, ready for you to review before publishing.
Step 8 — Enable Elementor AI Layouts (Optional)
If you have Elementor installed, there’s an extra capability worth enabling. This is what makes “Google Antigravity Elementor layout generator” searches so popular right now — the agent can design full page layouts from a single prompt.
- In WordPress, go to MCP → Settings inside the WSP plugin
- Enable the Elementor capabilities toggle
- Save settings
Back in Antigravity, you can now prompt:
/browser Create a homepage for a fitness coaching business using Elementor. Include a hero section, a services section with 3 offerings, and a contact form at the bottom.The agent will generate an Elementor-compatible layout, push it to your WordPress site, and even use the Browser Subagent to preview how it looks in Chrome. It’s not perfect every time, but it’s genuinely impressive when it works.
⚠️ Don't Skip This — Read "My Experience" Before Setup!This section documents two real Windows-specific errors that completely halted the WordPress MCP connection mid-setup — a config file permission block and a missing %PATH% executable error. If you are on a Windows PC, reading this first saves you at least an hour of frustrating debugging. These errors are not covered in any other tutorial on connecting WordPress MCP to Google Antigravity 2.0.
My Experience — What Actually Happened (+ 2 Real Windows Errors Solved)
I want to be honest about how this went, because the step-by-step instructions above make it sound cleaner than reality.
The first time I tried this, I got an “EOF” error immediately after pasting the MCP config. Spent an hour convinced the JSON was malformed. It wasn’t — the problem was an expired authentication token in Antigravity’s local cache. The fix (clearing the auth tokens folder) took about 30 seconds once I knew what to look for. That’s the kind of thing no tutorial tells you until after you’ve already been stuck for an hour.
The second issue was the Application Password. I copied it from WordPress and stripped the spaces out of habit, assuming they were formatting artifacts. They’re not — the spaces are part of the credential format. Once I pasted it with spaces intact, authentication worked immediately.
The actual integration, once it connected, was surprisingly capable. I tested it by asking the agent to audit my 47-post blog and add meta descriptions to any posts that were missing them. It worked through all 47 posts, identified 12 without meta descriptions, wrote them based on each post’s content, and updated the posts — in about four minutes. That would have taken me the better part of an afternoon to do manually.
Where it struggled: anything involving complex Elementor templates with existing content already on the page. The agent tends to start fresh rather than modify existing structures. For new pages it’s excellent; for revamping existing design-heavy pages, you’ll still want to do that manually.
The free tier’s 20-request-per-day limit is tight. That audit task I described used roughly 15 requests. I switched to AI Pro after my first week, and the experience is significantly better for anything beyond simple testing.
Windows Problem 1 — System Protection Blocked the mcp_config.json Edit
On Windows, there is an extra layer of friction that does not appear in Mac or Linux tutorials. When setting up WordPress MCP integration with Google Antigravity 2.0 on Windows, any automated tool or agent that tries to write to C:\Users\[username]\.gemini\config\mcp_config.json gets blocked immediately. Windows System Protection Boundary Rules restrict automated writes to user-profile directories during background process execution — even when you are logged in as an administrator.
The error shows up as a silent permission denial: the config update appears to succeed but the file is never actually modified. This “mcp_config.json permission denied Windows” issue is not a bug in Antigravity or the MCP plugin — it is standard Windows 10/11 UAC behavior. The fix is straightforward once you know it:
- Open File Explorer and navigate to
C:\Users\[your-username]\.gemini\config\ - Right-click
mcp_config.jsonand open it with VS Code or Notepad - Manually paste the WordPress MCP JSON config block (from Step 4 of this guide) into the correct position inside the file
- Save with Ctrl+S
Manual edits bypass the Windows protection entirely — only automated background writes are blocked. After saving manually, restart Antigravity and it picks up the new config immediately. Always edit mcp_config.json by hand on Windows — never rely on an automated tool to do it for you.
Windows Problem 2 — “mcp-wordpress-remote” Not Found in %PATH%
After sorting the config file, the next Google Antigravity WordPress MCP Windows error was this:
Error: exec: "mcp-wordpress-remote": executable file not found in %PATH%This happened because some auto-generated configs and older tutorials set "command": "mcp-wordpress-remote" directly in mcp_config.json. Since the @automattic/mcp-wordpress-remote package was not globally installed on the system, Windows had no executable with that name to call. The “mcp-wordpress-remote not found PATH Windows” error is specific to this bare-command config format.
Two fixes for this — choose whichever suits your setup:
Fix A — Global npm install (recommended for Windows, the fix I used): Open Command Prompt or PowerShell as Administrator and run:
npm install -g @automattic/mcp-wordpress-remoteThis installs the package globally and automatically registers mcp-wordpress-remote as a system-wide command in %PATH%. After running this once, restart Antigravity — the error is gone permanently and the WordPress MCP server on Windows connects cleanly.
Fix B — Use npx in your JSON config (no global install needed): Update mcp_config.json so the command field reads "npx" instead of the bare executable name, and pass the package as an argument. This is exactly the format shown in Step 4’s JSON template. If you follow that guide config precisely, you will not hit this PATH error at all.
If you want to extend your Windows automation setup further, our Self-Host n8n with Docker on Windows Guide pairs perfectly with this setup — n8n can trigger and coordinate Antigravity agents as part of a larger automation pipeline.
After resolving both of these Windows-specific issues, the Antigravity + WordPress MCP connection worked cleanly on the first try. Everything else — the Application Password spacing, the EOF token error, the Elementor limitations — matched the general experience described earlier in this guide.
Troubleshooting — When Things Break
This section covers the errors you’re most likely to hit when you connect WordPress MCP to Google Antigravity 2.0. None of these errors are well-documented in official guides, which is exactly why they’re here.
MCP Connection Fails with “EOF” Error
What you see: Something like calling "initialize": EOF in the Antigravity logs or a red indicator next to the WordPress MCP server.
What’s happening: Antigravity’s background MCP process is holding an expired Google authentication token. The MCP server initialization calls Google’s API to verify credentials, gets an invalid token response, and fails silently with an EOF.
Fix:
- On macOS: Run
rm -rf ~/Library/Application\ Support/Antigravity/auth-tokensin Terminal - On Windows: Delete the
auth-tokensfolder inside%APPDATA%\Antigravity\ - On Linux: Delete
~/.config/Antigravity/auth-tokens
After deleting the folder, restart Antigravity completely and re-authenticate with your Google account. The MCP server should connect cleanly.
Application Password Not Accepted
What you see: Authentication errors when the agent tries to access your WordPress site. The MCP server shows green but WordPress returns 401 Unauthorized responses.
What’s happening: Either the Application Password was pasted without the spaces, or the wrong password type was used (your main WordPress login password won’t work here).
Fix: Go back to Users → Your Profile → Application Passwords in WordPress. Click Revoke All to clear old ones, then generate a fresh password. When you copy it, include the spaces exactly as shown. Paste it directly into the WP_API_PASSWORD field in your MCP config without modification.
Also confirm that your WordPress site’s “WordPress MCP application password” user has the Administrator role. Editor-level permissions may not be sufficient for all MCP operations.
Agent Stuck on “Generating…”
What you see: The agent starts a task, shows “Generating…” or “Working…”, and then nothing. It sits there indefinitely.
What’s happening: Almost always a quota hit. When the Gemini API quota is exhausted, the agent doesn’t show a clear error — it silently stalls. This is a known UX problem with Antigravity.
Fix:
- Open Antigravity’s DevTools (Help → Toggle Developer Tools)
- Go to the Network tab and trigger the stuck request
- Look for a 429 Too Many Requests or 403 Forbidden response from Google’s API
- If you see a 429, your quota is exhausted — wait for the 5-hour refresh cycle or buy credits
- If you see a 403, check whether your Google account is properly signed in
Quota Exhausted / HTTP 429 Error
What’s happening: You’ve hit your usage limit. The “Antigravity quota limit fix” that most people are looking for depends on which tier you’re on.
Fix options:
- Free tier: Wait for the 5-hour refresh cycle. The free tier refreshes automatically, so you’ll have capacity again within a few hours.
- Switch models: Go to the model selector in Antigravity’s bottom-right corner and switch to Gemini Flash. Flash has lighter quota consumption and is often unaffected when Pro-tier models are limited.
- Buy credits: Go to Settings → AI Credit Overages → set to Always. Then purchase credits ($25 for 2,500). This lets the agent continue automatically after quota runs out, drawing from your credit balance.
- Pro tier with lockout: If you’re Pro and showing a weekly-refresh lockout, unfortunately you’re waiting for the weekly reset. This is the controversial behavior introduced in March 2026 — it has improved but hasn’t fully gone away.
Pro Account Showing Free Tier Limits
What’s happening: You’re paying for Pro, but Antigravity shows “Free tier” in the interface and applies free-tier quota limits. This is a known subscription sync bug that’s affected users since the v1.20.5 update.
Fix:
- Go to Settings → Account → Sign Out
- Close Antigravity completely and wait 30 seconds
- Reopen and sign back in
- Check your Google account at
aistudio.google.comto verify the Pro subscription is active
If the issue persists after signing back in, submit a support request through Antigravity’s Help menu with your account details. This is a server-side subscription sync issue, not something you can fix on your end.
Windows Only — mcp_config.json Edit Returns “Permission Denied”
What you see: Any automated process or agent that tries to update C:\Users\[username]\.gemini\config\mcp_config.json fails silently or shows a permission error, even with administrator-level access active.
Why it happens: Windows System Protection Boundary Rules block automated background writes to user-profile directories. This is standard Windows 10 and Windows 11 UAC-level behavior — not a bug in Antigravity or the WordPress MCP plugin.
Fix: Always edit mcp_config.json manually on Windows. Open File Explorer, navigate to C:\Users\[your-username]\.gemini\config\, right-click the file, open in VS Code or Notepad, paste the WordPress MCP server config block from Step 4, and save with Ctrl+S. Manual edits bypass the protection completely — only automated background writes are blocked.
Windows Only — “mcp-wordpress-remote” Executable Not Found in %PATH%
What you see: Error: exec: "mcp-wordpress-remote": executable file not found in %PATH% when Antigravity tries to start the WordPress MCP server process.
Why it happens: The config is using the bare command name mcp-wordpress-remote as the launch command instead of npx. If the @automattic/mcp-wordpress-remote package is not globally installed, Windows has no executable to call.
Fix Option 1 — Global npm install:
npm install -g @automattic/mcp-wordpress-remoteRun this once in Command Prompt or PowerShell (Administrator). The package installs globally and mcp-wordpress-remote is added to %PATH% automatically. Restart Antigravity after installing — the error does not return.
Fix Option 2 — Update config to use npx: Edit mcp_config.json and change the command from "mcp-wordpress-remote" to "npx", with ["-y", "@automattic/mcp-wordpress-remote@latest"] as the args. This is the recommended format from Step 4 and requires no global installation.
Advanced Hacks for Power Users
Scheduled Tasks for Auto-Publishing WordPress Posts
This is the feature that no competitor tutorial is currently covering (see also: how to stack multiple MCP servers in Antigravity), and it’s one of the most powerful things you can do with the Antigravity 2.0 WordPress MCP setup.
Scheduled Tasks in Antigravity 2.0 let you define cron-style prompts that agents run automatically on a recurring schedule. For WordPress, that means you can set up an agent that wakes up every Monday morning, generates a blog post on a topic you specify, and publishes it — with no input from you after the initial setup.
To set this up, use the /schedule command in Antigravity 2.0:
/schedule 0 9 * * 1 "Write a 600-word blog post about AI trends in small business, publish it as a draft on my WordPress site, and set the category to Weekly Insights."The first part (0 9 * * 1) is a standard cron expression meaning “9:00 AM every Monday.” The quoted text is the prompt the agent will receive. With WordPress MCP connected, it has everything it needs to execute this without asking you for anything.
For a broader look at what AI agents can automate across your entire workflow stack in 2026 — not just WordPress — see our AI Agent Automation Workflows in 2026 Guide.
This is what “Antigravity 2.0 scheduled tasks WordPress” actually looks like in practice. It’s not perfect — you’ll want to review drafts before they go live — but for a content team trying to maintain publishing consistency, it’s a genuine time-saver.
Browser Subagent for Live WordPress Preview
Google Antigravity 2.0’s Browser Subagent spins up a real Chromium instance that can navigate to your WordPress site, click through pages, fill forms, and take screenshots while working. For the WordPress integration, this is particularly useful for verifying that AI-generated pages look right before you finalize them.
Use the /browser command explicitly to trigger browser mode:
/browser Go to https://yoursite.com/services/ and verify the page layout matches the design brief. Take a screenshot of each section and report any visual issues.The agent will open your live WordPress page in Chrome, scroll through it, capture screenshots, and report back on what it sees. It can then go back into the editor and make corrections — all in one loop. This is the workflow that genuinely sets Antigravity apart from every other AI coding tool in this space right now.
Google Antigravity 2.0 vs. Cursor for WordPress
This is a question that comes up constantly, so here’s the honest side-by-side:
| Feature | Google Antigravity 2.0 | Cursor Pro |
|---|---|---|
| WordPress MCP Support | ✅ Native MCP Store integration | ✅ MCP supported (manual config) |
| Browser Subagent | ✅ Real Chrome, visual testing | ❌ Not available |
| Scheduled Tasks | ✅ Cron-style auto-runs | ❌ Not available |
| Multi-Agent (Parallel) | ✅ Dynamic subagents | ❌ Single-agent model |
| Price (base paid tier) | $20/month (Pro) | $20/month (Pro) |
| Quota Stability | ⚠️ Improving but inconsistent | ✅ More predictable |
| IDE Experience | ⚠️ Agent-first, less traditional | ✅ Best daily editing experience |
| Best For WordPress | Autonomous content + page-building tasks | Custom plugin/theme development |
The bottom line: Antigravity is better for autonomous, hands-off WordPress content work. Cursor is better for writing actual WordPress PHP or JavaScript code. Many developers end up using both.
Frequently Asked Questions
- Is the free tier enough to connect WordPress MCP to Google Antigravity 2.0?
- Yes, you can complete the full setup on the free tier. But at 20 agent requests per day, you’ll hit the limit quickly once you start running real tasks. The integration test itself uses a few requests, so you’ll have quota left to explore. For ongoing use, AI Pro at $20/month makes much more sense.
- Does my WordPress site need to be on a specific hosting provider?
- No specific host is required. Any self-hosted WordPress installation with HTTPS enabled will work. The main requirement is that your site’s REST API is accessible from the internet — most shared hosts and VPS setups meet this requirement by default. WordPress.com (the hosted version) does not support custom MCP plugins.
- Is it safe to give Antigravity an Application Password?
- Application Passwords are designed exactly for this use case. They’re isolated credentials that can be revoked at any time without changing your main WordPress password. The AI agent can only do what a logged-in admin user can do through the REST API — it has no direct database or file system access. Standard security practice: create a dedicated WordPress user for MCP access rather than using your primary admin account, and give it the minimum necessary permissions.
- What’s the difference between the MCP Adapter Plugin and WSP WordPress MCP?
- Historically, you needed both — the MCP Adapter Plugin to expose the server endpoint and WSP to add WordPress-specific capabilities. As of WSP v2.2 (2026), the single WSP plugin handles everything natively for clients like Antigravity, Cursor, and Claude Code. The two-plugin method still works if you have an older setup, but new installations should use WSP alone.
- Can I use this to generate WooCommerce product listings?
- Yes, with some caveats. WSP’s MCP integration includes WooCommerce capabilities if WooCommerce is active on your site. The agent can create products, update pricing, manage inventory, and handle categories. Complex WooCommerce operations (subscriptions, variable products with many attributes) sometimes need multiple prompts to get right, but the basics work well.
- What happens if my quota runs out mid-task?
- The agent stalls silently — usually showing “Generating…” indefinitely. To prevent partial task completion from causing problems, enable AI Credit Overages: Always in Antigravity’s settings before starting any long-running WordPress tasks. This lets the agent draw from your credit balance when the plan quota runs out, rather than freezing mid-operation.
- Does this work on Windows and Linux, or just Mac?
- The setup works on all three operating systems. The auth token path for clearing expired credentials differs by OS (covered in the troubleshooting section above), but the core MCP configuration process is identical on Windows, macOS, and Linux.
Final Thoughts
The process to connect WordPress MCP to Google Antigravity 2.0 is one of those setups that takes about 30 minutes and then changes how you work indefinitely. The initial friction — the EOF errors, the application password format, the quota surprises — is real. But it’s a one-time friction that pays dividends every time you need content created, pages built, or site maintenance done at scale.
If you manage a WordPress site and you’re not using AI automation yet, this is a solid place to start. You don’t need to be a developer. You just need a WordPress admin login, a Google account, and about half an hour to follow the steps above.
The features that make this integration genuinely compelling are the ones competitors haven’t caught up on yet: “Antigravity 2.0 scheduled tasks WordPress” for automated content pipelines, the Browser Subagent for visual verification, and multi-agent parallel execution for complex build tasks. These aren’t marketing features — they’re real workflow accelerators once the connection is stable.
Start with the free tier to verify that you can connect WordPress MCP to Google Antigravity 2.0 correctly on your site. If you’re doing this for real content production, upgrade to Pro. And buy a credit buffer before your first big project — you’ll thank yourself later.
If you run into any issues not covered in the troubleshooting section, the Antigravity community forums at discuss.ai.google.dev are the fastest place to find current workarounds. The platform updates frequently, and community knowledge tends to be more current than official documentation.