
Self-Host n8n with Docker on Windows Best 2026 Step-by-Step Guide

There is a specific moment every tech enthusiast, developer, or digital entrepreneur hits when building automation systems. You set up a few basic workflows on platforms like Zapier or Make, and everything feels effortless—until the first bill arrives, or worse, until you hit strict task execution limits right in the middle of a critical campaign.
When you start dealing with complex AI workflows, multi-step data pipelines, or high-volume API integrations, cloud-hosted SaaS tools can quickly cost hundreds of dollars every single month. That is precisely why thousands of creators and engineering teams in 2026 are turning to self-hosting.
Among all workflow engines available today, n8n stands out as the undisputed leader for self-hosted automation. It offers a visual drag-and-drop builder, native support for AI agents, deep Model Context Protocol (MCP) integrations, and over 400 pre-built nodes. Best of all, when you self-host n8n, there are zero task limits, zero per-workflow charges, and complete control over your data.
In this comprehensive guide, I will walk you through how to self-host n8n with Docker on Windows (Windows 10 or Windows 11) using Docker Desktop, WSL 2, and Docker Compose. Whether you are running a local home lab or preparing a local testing ground for enterprise workflows, this guide covers every single click, command, and configuration step from start to finish.
Table of Contents
- 1. Why Self-Host n8n on Windows in 2026?
- 2. Windows Prerequisites & Hardware Checklist
- 3. Step 1: Installing & Configuring WSL 2
- 4. Step 2: Installing Docker Desktop for Windows
- 5. Step 3: Setting Up Your n8n Project Directory
- 6. Step 4: Building a Production-Ready docker-compose.yml
- 7. Step 5: Launching & Initializing n8n Instance
- 8. Step 6: Accessing the Web Editor & Owner Account
- 9. Step 7: Exposing Webhooks via Cloudflare Tunnel & HTTPS
- 10. Step 8: Connecting Local LLMs & Ollama Agents
- 11. Step 9: Updating, Backups, and Maintenance
- 12. Step 10: Troubleshooting Common Windows & Docker Errors
- 13. Self-Hosted vs. Cloud Automation Comparison
- 14. Frequently Asked Questions (FAQs)
- 15. Conclusion & Action Steps
1. Why Self-Host n8n on Windows in 2026?
Before diving into terminal commands, let us address a common question: “Why should I self-host n8n on a Windows PC instead of buying a VPS or using cloud services?”
Running n8n locally on your Windows machine offers several unmatched advantages:
- Zero Execution Costs: You can run millions of workflow operations every month without paying a single dollar in task fees. Your local hardware handles the processing power.
- Total Data Privacy & Compliance: Your credentials, API tokens, database connections, and internal documents never leave your local machine or private network.
- Seamless Local AI Integration: If you run local AI models (like Ollama, Llama 3, or Gemma 4) on your Windows GPU, a local n8n instance can communicate with your local LLMs at lightning speeds without internet latency.
- Ideal Development & Sandbox Environment: It provides a safe, risk-free environment to prototype, debug, and test complex automation flows before deploying them to production cloud servers.
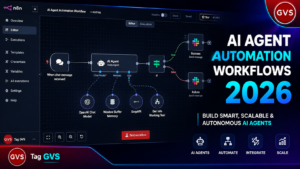
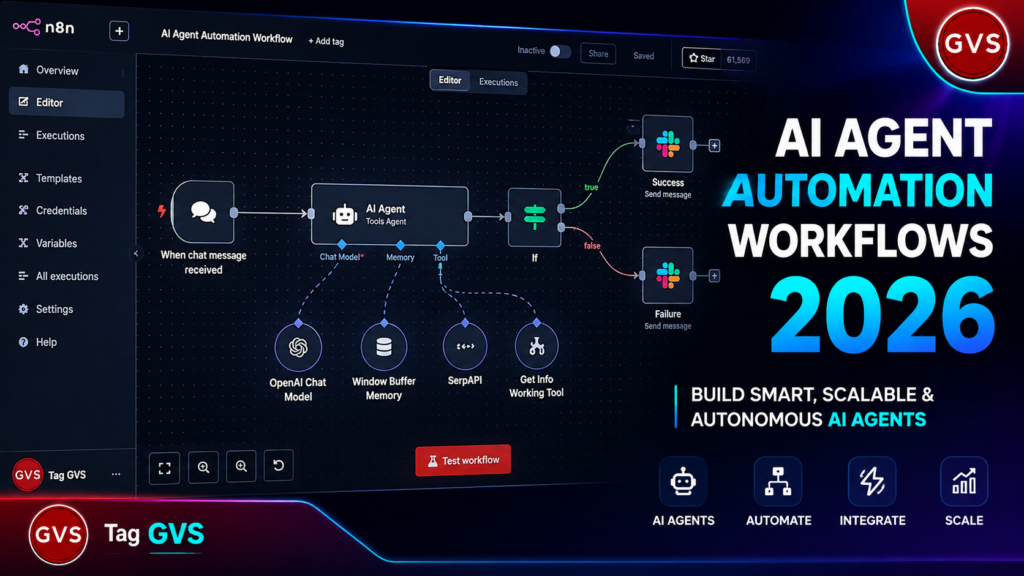
To learn more about building autonomous agentic architectures, check out our guide on AI Agent Automation Workflows in 2026.
“Self-hosting n8n locally gives developers and automation architects complete freedom to experiment with LLM agents, local databases, and custom APIs without worrying about API limits or per-task pricing.”
2. Windows Prerequisites & Hardware Checklist
To ensure a smooth, error-free setup, verify that your Windows machine meets the following minimum and recommended specifications:
- Operating System: Windows 10 64-bit (Build 19041 or higher) or Windows 11 (Home, Pro, Enterprise, or Education).
- Processor: 64-bit CPU with Hardware Virtualization (VT-x / AMD-V) enabled in your BIOS/UEFI.
- System RAM: Minimum 8 GB (16 GB or more is highly recommended if you plan to run PostgreSQL and AI workflows simultaneously).
- Disk Space: At least 15–20 GB of free storage. Storing Docker data on a secondary drive (e.g.,
D:\n8n_data) is recommended to avoid filling your systemC:\drive. - Administrative Access: Administrator rights on Windows to execute PowerShell commands and install Docker Desktop.
3. Step 1: Installing & Configuring WSL 2 (Windows Subsystem for Linux)
To run Docker containers efficiently on Windows 10 or Windows 11 without significant virtualization overhead, Microsoft developed WSL 2 (Windows Subsystem for Linux 2). WSL 2 runs a real Linux kernel lightweight utility inside Windows, providing native file system performance and seamless integration with Docker Desktop.
Follow these exact steps to enable and configure WSL 2 on your system:
3.1 Open PowerShell as Administrator
Click on your Windows Start Menu, search for PowerShell, right-click on Windows PowerShell, and select “Run as Administrator”.
3.2 Execute the WSL Installation Command
Inside the PowerShell terminal window, type the following unified installation command and press Enter:
wsl --installThis single command performs several automated tasks behind the scenes:
- Enables the optional Virtual Machine Platform feature.
- Enables the Windows Subsystem for Linux feature.
- Downloads and installs the latest Linux kernel update package.
- Downloads and sets up Ubuntu as your default Linux distribution.
3.3 Restart Your Computer
Once the PowerShell command completes, restart your Windows PC to allow system drivers and virtualization features to load properly.
3.4 Complete Ubuntu Initialization
After your system reboots, a new terminal window titled Ubuntu will automatically pop up. Wait a few moments for the installation to finalize, then enter a new UNIX username and password when prompted.
3.5 Verify WSL 2 Version
Open a fresh PowerShell window and verify that WSL is running on version 2 by running:
wsl -l -vYou should see an output displaying Ubuntu with VERSION 2. If for any reason your distribution displays version 1, upgrade it to version 2 using:
wsl --set-version Ubuntu 2
wsl --set-default-version 2
4. Step 2: Installing & Configuring Docker Desktop for Windows
Now that WSL 2 is configured, the next step is installing Docker Desktop for Windows. Docker Desktop provides the container runtime, Docker Engine, and Docker Compose CLI tools required to launch and orchestrate n8n containers.
4.1 Download Docker Desktop
Open your browser and navigate to the official Docker Desktop Download Page. Click on the “Download for Windows” button to obtain the installer executable.
4.2 Run the Docker Desktop Installer
Locate the downloaded Docker Desktop Installer.exe file in your Downloads folder, double-click it to start setup, and follow these configuration prompts:
- On the Configuration screen, ensure the option “Use WSL 2 instead of Hyper-V (recommended)” is checked.
- Ensure the option to create a desktop shortcut is selected for easy access.
- Click OK and wait for the installer files to unpack.
- Once installation completes, click Close and restart if prompted.
4.3 Configure WSL 2 Integration in Docker Desktop
After logging back into Windows, open Docker Desktop from your desktop shortcut or Start Menu. Accept the Docker Service Agreement. Then follow these steps to verify WSL 2 integration:
- Click the Gear icon (Settings) in the top-right toolbar of Docker Desktop.
- Select General from the left sidebar and confirm that “Use the WSL 2 based engine” is enabled.
- Navigate to Resources > WSL Integration in the left sidebar.
- Ensure the toggle switch “Enable integration with my default WSL distro” is set to ON.
- Under Additional WSL distros, turn the toggle switch ON for Ubuntu.
- Click Apply & Restart at the bottom right to save settings.
4.4 Test Docker Installation via Command Line
To confirm that Docker is running correctly on your Windows system, open PowerShell or Windows Terminal and run the following diagnostic commands:
docker --version
docker compose version
docker run hello-world
5. Step 3: Setting Up Your n8n Project Directory & Environment Variables
When running containerized services on Windows, organizing your file structure properly is essential. Follow this clean, structured process to set up your n8n workspace:
5.1 Create Your Workspace Folder
Open PowerShell and create a dedicated workspace folder. If you have a secondary drive (such as drive D:\), store your data there to avoid filling your main Windows system drive:
# Create workspace folder on D drive (Recommended)
mkdir D:\n8n_stack
cd D:\n8n_stack

# If you only have a C drive, use the root level:
# mkdir C:\n8n_stack
# cd C:\n8n_stack
If you want to orchestrate your AI workflows across multiple IDEs and agents, explore our Complete Guide to Multiple MCP Servers in Google Antigravity.
5.2 Generate a Secure Encryption Key
n8n encrypts sensitive credentials (like API keys, database passwords, and OAuth tokens) before storing them in its database. To secure your credentials, n8n requires an encryption key. Generate a random 32-character alphanumeric key directly in PowerShell by running:
-join ((48..57) + (65..90) + (97..122) | Get-Random -Count 32 | ForEach-Object {[char]$_})5.3 Create the Environment File (.env)
Inside your D:\n8n_stack directory, create a hidden environment file named .env. This file centralizes configuration parameters, credentials, and URL settings:
# System & Domain Configuration
N8N_HOST=localhost
N8N_PORT=5678
N8N_PROTOCOL=http
N8N_EDITOR_BASE_URL=http://localhost:5678/
WEBHOOK_URL=http://localhost:5678/
GENERIC_TIMEZONE=Asia/Kolkata

# Master Security Encryption Key
N8N_ENCRYPTION_KEY=x9K2pM7vL4qR8wN1zT5yB3jH6fG0sD2a

# PostgreSQL Database Configuration
POSTGRES_USER=n8n_admin
POSTGRES_PASSWORD=SuperSecretDBPassword2026!
POSTGRES_DB=n8n_database
POSTGRES_PORT=5432
6. Step 4: Building a Production-Ready docker-compose.yml
For a robust, production-grade self-hosted setup, pairing n8n with a dedicated PostgreSQL database container is the gold standard in 2026. Docker Compose allows us to define both containers, health checks, network bridges, and persistent storage volumes in a single configuration file.
6.1 Create the docker-compose.yml File
Inside your D:\n8n_stack directory, create a file named docker-compose.yml and paste the following production stack definition:
version: '3.8'

services:
  postgres:
    image: postgres:16-alpine
    container_name: n8n_postgres_db
    restart: always
    environment:
      - POSTGRES_USER=${POSTGRES_USER}
      - POSTGRES_PASSWORD=${POSTGRES_PASSWORD}
      - POSTGRES_DB=${POSTGRES_DB}
    volumes:
      - postgres_data:/var/lib/postgresql/data
    healthcheck:
      test: ["CMD-SHELL", "pg_isready -U ${POSTGRES_USER} -d ${POSTGRES_DB}"]
      interval: 5s
      timeout: 5s
      retries: 10
    networks:
      - n8n_network

  n8n:
    image: docker.n8n.io/n8nio/n8n:latest
    container_name: n8n_app_server
    restart: always
    ports:
      - "5678:5678"
    environment:
      - DB_TYPE=postgresdb
      - DB_POSTGRESDB_HOST=postgres
      - DB_POSTGRESDB_PORT=${POSTGRES_PORT}
      - DB_POSTGRESDB_DATABASE=${POSTGRES_DB}
      - DB_POSTGRESDB_USER=${POSTGRES_USER}
      - DB_POSTGRESDB_PASSWORD=${POSTGRES_PASSWORD}
      - N8N_HOST=${N8N_HOST}
      - N8N_PORT=${N8N_PORT}
      - N8N_PROTOCOL=${N8N_PROTOCOL}
      - N8N_EDITOR_BASE_URL=${N8N_EDITOR_BASE_URL}
      - WEBHOOK_URL=${WEBHOOK_URL}
      - GENERIC_TIMEZONE=${GENERIC_TIMEZONE}
      - N8N_ENCRYPTION_KEY=${N8N_ENCRYPTION_KEY}
    depends_on:
      postgres:
        condition: service_healthy
    volumes:
      - n8n_data:/home/node/.n8n
    networks:
      - n8n_network

networks:
  n8n_network:
    driver: bridge

volumes:
  postgres_data:
    name: n8n_postgres_volume
  n8n_data:
    name: n8n_app_volume
7. Step 5: Launching & Initializing the n8n Stack
With your .env file and docker-compose.yml stack configuration in place, you are ready to launch your self-hosted n8n instance.
7.1 Execute Docker Compose Up
Ensure your PowerShell window is pointed at your project folder (cd D:\n8n_stack) and run the following command:
docker compose up -d7.2 Verify Running Containers & Health Status
Check the active status of your running stack using:
docker compose psTo monitor real-time initialization logs, execute:
docker compose logs -f n8n8. Step 6: Accessing the Web Editor & Owner Account Onboarding
Open your preferred web browser (Chrome, Edge, Firefox, or Brave) and navigate to:
http://localhost:5678/8.1 Create Your Owner Account
On your first visit, n8n presents an Owner Account Setup wizard. Fill in your primary email address, full name, and a strong password (minimum 8 characters) to create your master admin credentials.
If you want to connect Claude AI directly to your WordPress site and YouTube channel, review our Claude AI WordPress & YouTube Integration Guide.
9. Step 7: Exposing Webhooks via Cloudflare Tunnel & HTTPS
When running n8n locally at http://localhost:5678/, everything works seamlessly for internal triggers. However, when external cloud services (such as Stripe, WooCommerce, or GitHub) send live payloads, they require a public HTTPS (SSL/TLS) URL endpoint.
9.1 Setting Up Cloudflare Tunnel
Cloudflare Tunnel creates an encrypted outbound-only connection between your local Docker container and Cloudflare’s edge network without opening router ports. Add the cloudflared service directly into your docker-compose.yml file:
  cloudflared:
    image: cloudflare/cloudflared:latest
    container_name: n8n_cloudflare_tunnel
    restart: always
    command: tunnel --no-autoupdate run --token YOUR_CLOUDFLARE_TUNNEL_TOKEN_HERE
    networks:
      - n8n_network
In your .env file, update your base URLs to use your secure Cloudflare domain:
N8N_HOST=n8n.yourdomain.com
N8N_PROTOCOL=https
N8N_EDITOR_BASE_URL=https://n8n.yourdomain.com/
WEBHOOK_URL=https://n8n.yourdomain.com/
10. Step 8: Connecting Local LLMs & Ollama Agents
One of the single greatest advantages of self-hosting n8n on Windows is connecting your automation engine directly to local AI models running on your computer’s GPU using Ollama.
For multi-platform social media distribution with open-source AI tools, check out our tutorial on Universal AI Studio Free Open-Source Social Media Manager.
10.1 Pull Local AI Models in PowerShell
# Pull Gemma 4 model
ollama run gemma4

# Pull Llama 3 8B model
ollama run llama3
10.2 Connect n8n to Windows Host Ollama Instance
In Docker for Windows, use the special hostname host.docker.internal to connect to services running on your Windows host OS:
- In n8n, add an Ollama Chat Model node.
- Set the Credential Base URL to:
http://host.docker.internal:11434 - Select your model (e.g.,
gemma4orllama3) and test the connection.
11. Step 9: Updating, Backups, and Maintenance
11.1 Updating n8n to the Latest Release
docker compose pull
docker compose down
docker compose up -d
11.2 Automated PostgreSQL Database Backups
mkdir D:\n8n_stack\backups
docker exec -t n8n_postgres_db pg_dump -U n8n_admin n8n_database > D:\n8n_stack\backups\n8n_backup_$(Get-Date -Format "yyyyMMdd").sql
12. Step 10: Troubleshooting Common Windows & Docker Errors
12.1 High RAM Usage by WSL 2 (VMMem)
Create a .wslconfig file in C:\Users\YourUsername\.wslconfig:
[wsl2]
memory=6GB
processors=4
swap=2GB
localhostForwarding=true
Then run wsl --shutdown in PowerShell to apply the 6 GB RAM limit.
13. Self-Hosted n8n vs. Cloud Automation Platforms Comparison
| Feature / Metric | Self-Hosted n8n (Windows/Docker) | Zapier (Cloud) | Make.com (Cloud) | n8n Cloud (Managed) |
|---|---|---|---|---|
| Monthly Task Limits | Unlimited (Free) | 750 to 100,000 Tasks | 10,000 to 800,000 Operations | 2,500 to 50,000 Executions |
| Starting Price | $0 / Month | $19.99 / Month | $9.00 / Month | $24.00 / Month |
| Data Residency | 100% Local / On-Premise | Cloud US/EU Servers | Cloud US/EU Servers | Managed Cloud Servers |
| Local AI / Ollama Access | Native (host.docker.internal) | Not Supported | Not Supported | External API Only |
| MCP & AI Agents | Full Native Support | Limited Beta | Custom API Only | Full Native Support |
14. Frequently Asked Questions (FAQs)
Q1. Is self-hosting n8n with Docker on Windows completely free?
Answer: Yes. The n8n community edition is free to self-host for personal, internal, and business workflow automation. Docker Desktop and WSL 2 are also free for personal use and small businesses.
Q2. What happens to my n8n workflows if my Windows PC restarts?
Answer: Because we configured restart: always in our docker-compose.yml file and enabled persistent Docker volumes, Docker Desktop will automatically boot your PostgreSQL database and n8n container when your Windows system starts.
Q3. Can I connect local AI models (like Ollama or Llama 3) to n8n on Windows?
Answer: Absolutely. Using the hostname http://host.docker.internal:11434 in your n8n Ollama credentials allows your n8n container to connect directly to the Ollama service running on your Windows host GPU.
Q4. Can I store my n8n Docker data on my D: drive instead of C: drive?
Answer: Yes. Creating your project directory on D:\n8n_stack keeps your Windows system drive lean and prevents Docker logs or database volumes from consuming C: drive space.
Q5. Why is PostgreSQL recommended over SQLite for self-hosting n8n?
Answer: SQLite locks database files during write operations, which can trigger errors when running multiple workflows simultaneously. PostgreSQL handles high concurrency and parallel workflow queues with rock-solid stability.
15. Conclusion & Action Steps
Self-hosting n8n with Docker on Windows is one of the most empowering technology setups a developer, automation creator, or business owner can build in 2026. By combining the visual flexibility of n8n with the power of WSL 2, Docker Desktop, and PostgreSQL, you gain a production-ready automation server running right on your own machine.
Your Next Action Step: Open PowerShell, run wsl --install, and build your very first self-hosted n8n workflow today!