Universal AI Studio Free Open-Source AI Social Media Manager (Full Setup Guide 2026)


Universal AI Studio: The Free, Open-Source AI Social Media Manager You Actually Need (Full 2026 Setup Guide)
If you have been searching for a free AI social media manager open source alternative that does not lock you behind a monthly paywall, you are reading the right guide. Universal AI Studio is a locally hosted, Python-powered automation platform that connects your WordPress blog, YouTube channel, Instagram, Facebook Page, Meta Threads, and Telegram channel — all from a single dashboard on your own computer, at zero recurring cost.
Most people discover this project after getting burned by a SaaS tool. Maybe you tried Hootsuite and hit the account limit, or used Buffer and found the analytics locked behind a higher plan. Perhaps you tested Sprout Social at $249/month and realized you were paying enterprise prices for a creator-scale workflow. At some point you sign up for a $29/month plan, realize three more features require the $99 tier, and eventually you are paying hundreds of dollars per year for software that simply forwards your content to the same APIs you could call directly. Universal AI Studio removes that middleman entirely.
This guide covers the full picture: what the studio actually does under the hood, how to install it in under ten minutes, how to get every required API credential platform by platform, and how to start automating your content workflow today.
Table of Contents
What Universal AI Studio Actually Does
Before jumping into installation steps, it is worth understanding why this project is structured the way it is — because that understanding will save you hours of confusion later.
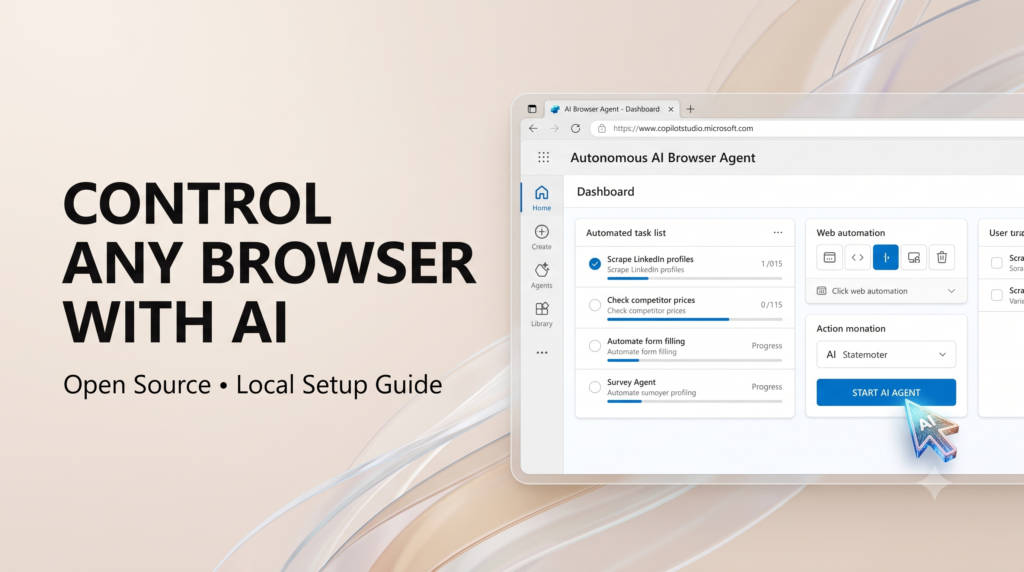
At its core, Universal AI Studio is a Flask web application that runs on your local machine at http://localhost:5000. When you open that address in your browser, you see a dashboard with a live connection status for every platform, a credential manager where you enter your API keys through a form instead of editing files directly, and controls for each automation engine.
The project is organized as follows:
Universal-AI-Studio/
├── app.py                    — Flask web server (runs at localhost:5000)
├── .env                      — Your local credentials file (never shared)
├── core/
│   ├── wp_engine.py          — WordPress: draft generation and live publishing
│   ├── yt_engine.py          — YouTube: channel scan and video metadata editor
│   ├── tg_engine.py          — Telegram: blog broadcasts and channel messages
│   ├── ig_engine.py          — Instagram: photo and Reel publishing
│   ├── fb_engine.py          — Facebook Page: post creation
│   └── threads_engine.py     — Meta Threads: text and image posts
├── utils/
│   ├── env_manager.py        — Reads and writes your .env file
│   └── image_utils.py        — Generates images at the correct aspect ratio
└── templates/
    └── index.html            — The web dashboard at localhost:5000
Every credential you enter through the dashboard is written to a local .env file that stays on your machine. It never leaves your computer. The engines use those credentials to call each platform’s official API directly — no third-party server involved.
The green and red status pills at the top of the dashboard reflect live connection checks. WordPress shows green when valid credentials are saved. YouTube shows green when your client_secret.json is in place. Telegram shows green when your bot token is valid and the bot is actually reachable.
Why a Free Open Source Tool Beats Paying for SaaS
The economics of AI social media tools are worth examining honestly. The AI itself — whether it is GPT-4o, Gemini, or Claude — costs a fraction of a cent per request when you call the API directly. A typical 1500-word blog post costs less than two rupees in raw API tokens. Yet platforms built on top of these models charge you $30 to $199 per month, with limits on how many posts you can generate, how many accounts you can connect, and which features are available on your tier.
With Universal AI Studio, you pay the API providers directly at their published rates, which works out to a tiny fraction of what SaaS tools charge. You have no account limits, no feature tiers, and full visibility into exactly what the code is doing because you can read every line of it.
| Feature | Paid AI Social Media Tools | Universal AI Studio |
|---|---|---|
| Monthly cost | $29 to $199+ | Free |
| Account limits | 3 to 5 profiles on most plans | Unlimited |
| Where your data goes | Third-party servers | Your machine only |
| Platforms covered | Varies by plan | WordPress, YouTube, IG, FB, Threads, Telegram |
| Can you modify the code? | No | Yes, full Python source |
| Works offline or locally | No | Yes |
| Post generation limits | Hard monthly caps | None |
There is also the privacy angle. When you use a SaaS tool like Predis.ai, SocialBee, or FeedHive, you are trusting a company with your API keys, your content drafts, your analytics data, and your audience information. Tools like Metricool and Later are genuinely excellent for what they do — but they are still cloud-based platforms where your data lives on someone else’s server. With Universal AI Studio, all of that stays on your own hardware. No third-party company can see your content calendar, your credentials, or your post history.
For creators and bloggers who are serious about building a content workflow that scales without scaling costs, a free AI social media manager open source solution like this is simply the smarter long-term choice. You get the same automated social media posting capabilities that paid tools offer — AI social media scheduling, multi-platform publishing, content broadcasting — at zero recurring cost. You own the tool. You control the data. You decide what it does.
If you enjoy setting up self-hosted AI workflows, be sure to check out our detailed guide on how to install Gemma 4 locally on PC or learn how to add Deep Research skills to Claude AI.
Installation: 5 Steps to Get Running
Prerequisites
Before you start, make sure you have the following installed on your machine:
- Python 3.9 or higher (check with
python --versionin your terminal) - Git (check with
git --version) - A terminal or command prompt
Building your own free AI social media manager open source pipeline gives you total control over how posts are formatted and scheduled across all social channels.
Step 1: Clone the Repository
git clone https://github.com/Sadhi-Team-16/Universal-AI-Studio.git
cd Universal-AI-Studio
The GitHub repository is at github.com/Sadhi-Team-16/Universal-AI-Studio. This gives you the full source code and all engine modules.
Step 2: Create a Virtual Environment
A virtual environment keeps the project’s Python dependencies isolated from your system installation. This prevents version conflicts if you have other Python projects on your machine.
Windows (PowerShell):
python -m venv .venv
.venv\Scripts\activate
Mac or Linux:
python3 -m venv .venv
source .venv/bin/activate
You will see (.venv) appear at the start of your terminal prompt when the environment is active. All subsequent commands should be run with this environment active.
Step 3: Install Dependencies
pip install -r requirements.txt
This installs Flask for the web server, the Google API client libraries for YouTube OAuth, the Requests library for WordPress and Meta API calls, and Pillow for image generation and resizing.
Step 4: Create Your Credentials File
# On Mac/Linux
cp .env.example .env

# On Windows PowerShell
Copy-Item .env.example .env
The .env file is where all your API keys are stored locally. You can edit it directly in any text editor, or fill in the fields through the web dashboard at localhost:5000 — which is the recommended approach since it validates the format before saving.
Step 5: Start the Studio
Windows (one-click launcher): Double-click run_studio.bat. This script automatically kills any process running on port 5000 first, ensuring a clean fresh start every time.
Mac or Linux:
chmod +x run_studio.sh
./run_studio.sh
Or run directly from any OS:
python app.py
Your default browser will open automatically at http://localhost:5000. The dashboard loads with the current connection status for each platform.
Getting Your API Credentials: Platform by Platform
This section is where most guides fall short. Below is a complete, step-by-step credential guide for each platform — no steps skipped.
1. WordPress Application Password
The studio connects to WordPress through its built-in REST API. Critically, you do not use your regular WordPress login password for this. WordPress has a dedicated Application Passwords feature specifically for automated tools.
What you need in your .env:
LOCAL_WP_URL='http://yoursite.local'
LIVE_WP_URL='https://yourdomain.com/wp-json/wp/v2'
LIVE_WP_USER='your_admin_email@example.com'
LIVE_WP_APP_PASS='xxxx xxxx xxxx xxxx xxxx xxxx'
How to get your Application Password:
- Log in to your WordPress admin at
https://yourdomain.com/wp-admin. - Go to Users in the left sidebar, then click Profile.
- Scroll down to the Application Passwords section. If this section is missing, your site may be on HTTP rather than HTTPS — Application Passwords require HTTPS on most hosts.
- In the “New Application Password Name” field, type something like
Universal AI Studio. - Click Add New Application Password.
- WordPress will display a 24-character password formatted in groups:
AbCd EfGh IjKl MnOp QrSt UvWx. Copy this immediately. It is shown only once. - Paste this password into your
.envfile asLIVE_WP_APP_PASS. Keep the spaces — the engine handles them correctly.
For LIVE_WP_URL, the format is always your domain followed by /wp-json/wp/v2. For a Hostinger site at techgvs.in, this would be https://techgvs.in/wp-json/wp/v2.
If you are testing on Local WP (a desktop WordPress development app), the local URL format is
http://yoursite.local. You will need a separate Application Password created in your local WordPress admin for this URL.
2. YouTube Data API v3
YouTube uses OAuth 2.0 authentication rather than a simple API key. This means you download a credential file from Google Cloud Console. The studio handles the browser-based authorization automatically — you only need to provide the initial file.
What you need in your .env:
YOUTUBE_CLIENT_SECRET_PATH='client_secret.json'
YOUTUBE_TOKEN_PATH='token.json'
About token.json: You do not need to create this file. The engine generates it automatically on first use. When you run any YouTube command for the first time, the system reads your client_secret.json, opens a browser window for Google sign-in, and writes the resulting authorization to token.json. Every subsequent run uses that saved token silently, and it auto-refreshes when it expires.
How to get client_secret.json:
- Go to console.cloud.google.com.
- Create a new project if needed: click the project dropdown and select New Project. Name it
Universal AI Studioand click Create. - With the project selected, go to APIs and Services in the left sidebar, then Library.
- Search for YouTube Data API v3. Click on it, then click Enable.
- Go back to APIs and Services and click Credentials.
- Click Create Credentials and choose OAuth client ID.
- If prompted, configure the consent screen first. Choose External, fill in your app name and email, then proceed through the steps.
- On the Create OAuth client ID screen, select Desktop app as the application type. Give it a name and click Create.
- In the Credentials list, find your new OAuth client and click the download icon on the right side.
- Rename the downloaded file to
client_secret.jsonand place it in the root folder of the Universal AI Studio project (same folder asapp.py).
If you paste the file path into the Credential Manager at localhost:5000, the system will automatically copy it to the project root for you.
With a reliable free AI social media manager open source setup running locally, you never have to worry about sudden subscription price hikes or feature deprecations.
3. Meta Graph API (Instagram, Facebook Page, and Threads)
The Meta setup is the most involved because one Developer App covers three platforms. The key concept is that you create a Meta Developer App, connect your Facebook Page and Instagram Business Account to it, then generate a long-lived access token.
What you need in your .env:
META_ACCESS_TOKEN='your_long_lived_access_token'
FB_PAGE_ID='your_facebook_page_id'
INSTAGRAM_ACCOUNT_ID='your_instagram_business_account_id'
THREADS_ACCOUNT_ID='your_threads_account_id'
Step A: Create a Meta Developer App
- Go to developers.facebook.com and log in with your personal Facebook account.
- Click My Apps in the top-right, then Create App.
- Choose Business as the use case and click Next.
- Enter a display name like
Tech GVS Studio, your contact email, and click Create App. - On your app dashboard, add the following products: Instagram Graph API, Facebook Login for Business, and Threads API.
Step B: Get Your Facebook Page ID
- Go to your Facebook Page.
- Click About in the left menu and scroll to find the Page ID.
Step C: Get Your Instagram Business Account ID
- In your Meta Developer App, go to Tools in the left sidebar, then Graph API Explorer.
- Select your page in the access token dropdown.
- Run the query:
me?fields=instagram_business_account - The response will show an
idfield. That is your Instagram Account ID.
Step D: Generate a Long-Lived Access Token
- In Graph API Explorer, click Generate Access Token and select permissions including
pages_manage_posts,instagram_content_publish, andthreads_content_publish. - Click the info icon next to the token, then Open in Access Token Tool.
- Click Extend Access Token at the bottom.
- Copy the long-lived token (valid for 60 days) and paste it as
META_ACCESS_TOKEN.
4. Telegram Bot and Channel
Telegram is the simplest platform to configure. You create a bot through BotFather, add it to your channel as an administrator, and get your channel ID.
What you need in your .env:
TELEGRAM_BOT_TOKEN='123456789:ABCdefGhIJKlmNoPQRsTUVwxyZ'
TELEGRAM_CHANNEL_ID='@your_channel_username'
Step A: Create a Bot
- Open Telegram and search for @BotFather (blue checkmark — official).
- Send the command
/newbot. - Enter a display name and a username ending in
bot. - BotFather will give you an HTTP API Token. Copy this as
TELEGRAM_BOT_TOKEN.
Step B: Add the Bot to Your Channel
- Open your Telegram Channel.
- Click the channel name, then Administrators, then Add Administrator.
- Search for your bot by username, select it, and ensure Post Messages is enabled.
Step C: Get Your Channel ID
For public channels with a username, use the username directly: @techgvs. For private channels, send a message to the channel and then open https://api.telegram.org/bot<YOUR_TOKEN>/getUpdates in a browser. Look for the chat.id field in the response — it will start with -100 for channels.
Many creators consider Universal AI Studio the ultimate free AI social media manager open source solution for small teams and solo developers.
Using Each Automation Engine
Once your credentials are configured and saved, these are the commands available from the terminal or callable from within app.py.
WordPress Engine
# Generate an AI blog draft with SEO meta and a 1200x675 featured image
python -c "from core.wp_engine import WPEngine; WPEngine().create_draft('Top Open Source AI Tools in 2026')"

# Publish the draft to your live WordPress site
python -c "from core.wp_engine import WPEngine; WPEngine().publish_live('drafts/latest_post.json')"
The create_draft command generates a structured HTML post, creates a 1200×675 featured image (correct for Google Discover), injects Rank Math SEO metadata, and saves everything to drafts/latest_post.json. The publish_live command reads that file and sends the complete post to your live site via the WordPress REST API.
YouTube Engine
# Authenticate and scan your channel (opens a browser for OAuth on first run)
python -c "from core.yt_engine import YTEngine; YTEngine.scan_channel()"

# Update metadata on a specific video
python -c "from core.yt_engine import YTEngine; YTEngine.update_video_metadata('VIDEO_ID', 'New Title', 'New description', ['tag1', 'tag2'])"
Instagram Engine
python -c "from core.ig_engine import IGEngine; IGEngine().publish_media('https://your-image-url.com/photo.jpg', 'Your caption here. #AI #OpenSource')"
Facebook Page Engine
python -c "from core.fb_engine import FBEngine; FBEngine().create_page_post('Your post text here.', 'https://techgvs.in')"
Meta Threads Engine
python -c "from core.threads_engine import ThreadsEngine; ThreadsEngine().create_thread_post('Your thread text here.', 'https://your-image-url.com/banner.jpg')"
Telegram Engine
# Broadcast a blog post to your Telegram channel
python -c "from core.tg_engine import TGEngine; TGEngine().broadcast_blog('Post Title', 'https://techgvs.in/post-slug/', 'Short summary of the post.')"
Image Sizes for Each Platform
The image_utils.py module generates correctly sized images automatically. The studio resizes your source image to fit within the target canvas without cropping or distorting — it adds padding to fill any space instead of stretching.
| Platform | Recommended Size | Aspect Ratio | Notes |
|---|---|---|---|
| WordPress / Google Discover | 1200 x 675 px | 16:9 | Required for Discover eligibility |
| YouTube thumbnail | 1280 x 720 px | 16:9 | Max 2MB, JPG or PNG |
| Instagram photo post | 1080 x 1080 px | 1:1 | Square format performs best |
| Instagram Reel / Story | 1080 x 1920 px | 9:16 | Vertical full-screen |
The 1200×675 size for WordPress is not arbitrary. Google Discover requires images to be at least 1200 pixels wide and explicitly marked with max-image-preview:large in the page’s robots meta tag. The WordPress engine sets both requirements automatically when it publishes a post.
Common Issues and Fixes
Port 5000 is already in use. The run_studio.bat launcher automatically kills any process on port 5000 and any orphaned Python backend processes before starting. If you start the app manually with python app.py and see this error, run netstat -ano | findstr :5000 to find the process ID, then taskkill /PID <PID> /F.
YouTube authentication keeps looping. Delete the token.json file in the project root and run the scan command again. A fresh browser authorization window will open.
Telegram shows “chat not found”. Your bot must be added as an administrator with Post Messages permission. Also check that TELEGRAM_CHANNEL_ID starts with @ for public channels or -100XXXXXXXXX for private ones.
WordPress returns 401 Unauthorized. Confirm you are using an Application Password, not your regular login password. Also verify that the email in LIVE_WP_USER matches the exact WordPress admin account email.
Meta token is expired. Long-lived tokens expire after 60 days. Open Graph API Explorer, generate a new token with the required permissions, extend it to a long-lived token, and update META_ACCESS_TOKEN in your .env.
Credential inputs disappear after page refresh. This is a UI configuration issue fixed in version 1.1.0. Update to the latest version from the repository. After the update, saved credentials will persist in the input fields across page reloads.
Frequently Asked Questions
Is Universal AI Studio truly free?
Yes, the software itself is free and open source under its repository license. The only costs are the API calls you make to third-party services — for example, if you use an OpenAI or Gemini key for AI content generation, you pay those providers directly at their published rates. Most content workflows cost less than the equivalent of a few rupees per article.
Does my data get sent to any external server?
No. The studio runs entirely on your local machine. Your API keys are stored in a local .env file. The only external connections are direct API calls to the platforms you configure — WordPress, YouTube, Meta, Telegram — and those go directly from your computer to each platform’s official API endpoint, with no intermediary server.
Can I use this on Windows, Mac, and Linux?
Yes. The core Python application works on all three. There is a run_studio.bat launcher for Windows and a run_studio.sh launcher for Mac and Linux. The credential manager and dashboard work identically in any browser on any operating system.
What happens to my YouTube token.json if it expires?
The engine handles token refresh automatically. When the stored token is close to expiry, the engine silently requests a new one using the refresh token that was saved during the original authorization. You will only need to re-authenticate manually if you delete token.json or revoke access from your Google account settings.
Can I run this on a VPS or cloud server instead of locally?
Yes, with some adjustments. Since YouTube OAuth requires a browser window to open for first-time authorization, you would need to run that step locally first, then upload the generated token.json to the server. All other platforms (WordPress, Meta, Telegram) work purely with API tokens and function identically on a server.
Is there a limit to how many posts I can generate or schedule?
There are no limits built into Universal AI Studio itself. The only limits you may encounter are rate limits imposed by each platform’s API — for example, Instagram has daily publishing limits, and the Meta API has per-hour call limits. These are documented in each platform’s developer documentation.
Is Universal AI Studio a good Hootsuite or Buffer alternative?
Yes — if your main frustration with tools like Hootsuite, Buffer, Metricool, or Later is the pricing and account limits, then Universal AI Studio is a direct answer to that. It covers WordPress, YouTube, Instagram, Facebook, Threads, and Telegram natively. The trade-off is that you set it up yourself (which this guide walks you through step by step), rather than having a polished SaaS onboarding. If you want a fully managed, no-setup-required tool, paid services are genuinely easier. But if you want zero recurring cost, full data ownership, and the ability to modify every line of behavior, this project is the better long-term choice.
How do I contribute to the project or report a bug?
The project is hosted on GitHub at github.com/Sadhi-Team-16/Universal-AI-Studio. You can open an issue to report bugs or suggest features, and pull requests are welcome for code contributions.
Conclusion
Universal AI Studio is what happens when you stop paying for middleware and connect directly to the APIs that power the tools you have been renting. It is a free AI social media manager open source solution that gives you WordPress automation, YouTube metadata editing, Instagram and Facebook publishing, Meta Threads posting, and Telegram broadcasting — all from a single dashboard on your own computer, with full control over your data and zero recurring fees. Think of it as the self-hosted, developer-first answer to what Hootsuite, Buffer, Predis.ai, and SocialBee charge you monthly to do on their servers.
The setup takes under ten minutes if you follow the steps above. Getting all four platform credentials configured might take an afternoon the first time, but you only do it once. After that, every piece of content you create, every post you publish, every Telegram broadcast you send — all of it runs at the cost of the API calls themselves, which is essentially nothing compared to what SaaS alternatives like Sprout Social, Later, FeedHive, or Metricool charge per month.
If you found this guide useful, consider subscribing to the Tech GVS YouTube channel for upcoming video tutorials on using each engine, and join the Telegram channel where new guides are announced. The full project source is available on GitHub — star the repository to stay updated on new features.
More questions? Drop them in the comments below, and the Tech GVS team will get back to you.