

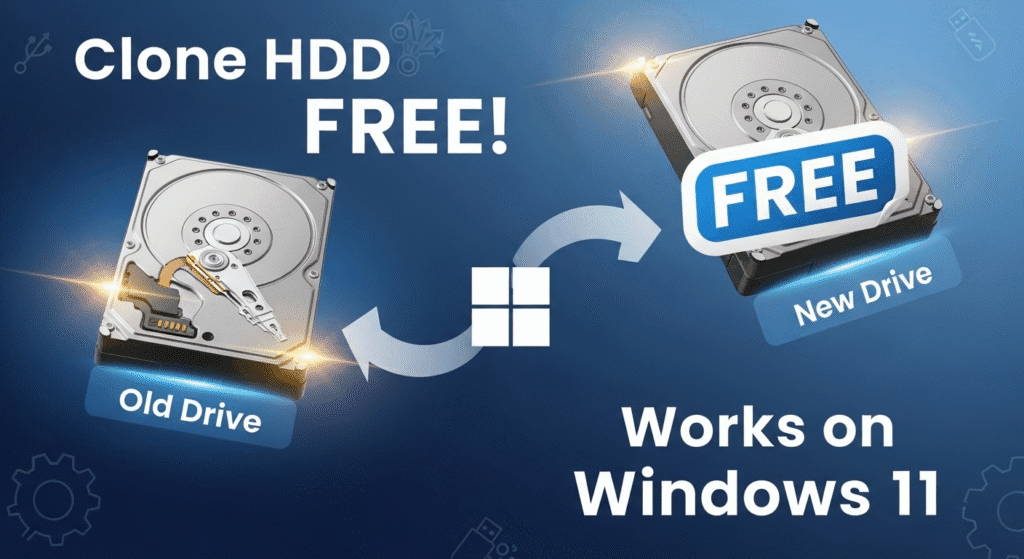
How to Clone Your Hard Drive Free HDD Clone Software
Have you ever felt that gut-wrenching moment when your computer starts making strange clicking sounds? Or when your system takes forever to boot up, and you know something’s not right? I’ve been there, and trust me, it’s terrifying. That’s exactly why I’m writing this guide today – to help you protect your precious data before it’s too late.
Cloning your hard drive isn’t just for tech geeks anymore. It’s become an essential skill for anyone who values their digital life. Whether you’re upgrading to a lightning-fast SSD or simply backing up your system before disaster strikes, having the right free disk cloning software for Windows can save you hours of frustration and potentially years of memories.
Why You Need to Clone Your Hard Drive (And Why Right Now)
Let me share something personal. Last year, my colleague Sarah lost five years of family photos when her laptop’s hard drive failed unexpectedly. She hadn’t backed up anything. The recovery service quoted her $1,500 with no guarantee of success. That moment changed how I think about data protection forever.
Here’s the reality: hard drives don’t last forever. They’re mechanical devices with moving parts that wear out over time. But here’s the good news – you can protect yourself right now with free HDD clone software for Windows that works just as well as expensive professional tools.
Think about what’s on your computer right now. Your photos, work documents, passwords, music collection, tax records, and countless hours of digital memories. What would happen if you lost all of that tomorrow? It’s not about being paranoid; it’s about being prepared.
What Exactly Is Disk Cloning? (Explained Simply)
Okay, so what’s the difference between copying files and cloning a drive? Great question! When you copy files, you’re just moving documents from one place to another. But when you clone your hard drive, you’re creating an exact replica of everything – your operating system, all your programs, system settings, hidden files, and every single bit of data.
Think of it like this: copying files is like packing your clothes when you move to a new house. Cloning is like having an identical house built somewhere else, complete with all your furniture arranged exactly the same way. The moment you walk in, everything works perfectly because it’s an exact duplicate.
This is incredibly powerful because when you clone HDD to SSD, you can literally swap out your old drive for the new one, turn on your computer, and continue working as if nothing changed. No reinstalling Windows, no reconfiguring settings, no hunting down license keys – everything just works.
The Best Free Disk Cloning Software for Windows (2025 Edition)
After testing dozens of tools and reading through countless user experiences, I’ve narrowed down the best options that won’t cost you a penny. These aren’t trial versions with annoying limitations – they’re genuinely free tools that professionals use every day.
1. Hasleo Disk Clone – The User-Friendly Champion
When I first tried Hasleo Disk Clone, I was honestly surprised by how simple it made everything. This free disk cloning software for Windows 11 and Windows 10 doesn’t overwhelm you with technical jargon. Instead, it guides you through the process with a clean, intuitive interface that feels like it was designed by someone who actually cares about user experience.
What makes Hasleo special? It supports both MBR and GPT disks, handles sector-by-sector cloning when you need it, and even lets you adjust partition sizes on the fly. Plus, it works natively with ARM64 systems, which is perfect if you’re using one of those new Windows on ARM devices.
Best for: Beginners who want something that “just works” without a steep learning curve.
2. AOMEI Backupper Standard – The Versatile Powerhouse
Here’s something cool about AOMEI Backupper – it can clone a larger hard drive to a smaller SSD. Yes, you read that right! As long as your used space fits on the target drive, AOMEI’s intelligent cloning feature makes it work seamlessly.
I’ve used AOMEI countless times for both personal projects and helping friends upgrade their computers. The software includes 4K partition alignment, which is crucial for SSD performance. It also creates bootable rescue media, so you can clone drives even when Windows won’t start.
One thing to note: the free version only supports data disk cloning. If you want to clone your system drive (the one with Windows), both source and destination disks need to use the same partition style (both MBR or both GPT).
Best for: Home users and small offices who need reliable, feature-rich SSD clone software free of charge.
3. Clonezilla – The Open-Source Legend
Now, I’ll be honest with you – Clonezilla isn’t for everyone. It doesn’t have a pretty graphical interface like the others. Instead, it runs as a bootable Linux-based environment with text menus. But don’t let that scare you away, because Clonezilla is incredibly powerful.
This free disk cloning software supports virtually every file system you can imagine – ext2, ext3, ext4, NTFS, FAT32, HFS+, UFS, and more. It’s completely open-source, meaning the community has reviewed and improved the code for years. Many IT professionals swear by Clonezilla for mass deployments and critical migrations.
The learning curve is steeper, but once you understand how it works, you’ll appreciate its reliability and flexibility. There are tons of YouTube tutorials that walk you through the process step-by-step.
Best for: Tech-savvy users, IT professionals, and anyone who values open-source software and doesn’t mind command-line interfaces.
4. EaseUS Partition Master Free – The All-in-One Solution
What I love about EaseUS Partition Master is that it’s not just a cloning tool – it’s a complete disk management suite. You get partition resizing, disk conversion, system migration, and yes, full disk cloning capabilities, all in one free package.
The interface is modern and straightforward. It works with all major disk types (M.2, NVMe, SATA SSDs, and traditional HDDs) and supports brands like Samsung, Western Digital, Seagate, and more. The sector-by-sector cloning option is there when you need it, but the intelligent clone mode saves time by only copying used sectors.
Best for: Users who want multiple disk management tools in addition to free disk cloning software for Windows 10.
5. Macrium Reflect Free – The Speed Demon
If cloning speed matters to you, Macrium Reflect Free deserves your attention. This software is blazing fast and includes advanced features like differential imaging and direct disk-to-disk cloning. You can even boot your backups as Hyper-V virtual machines, which is pretty incredible for a free tool.
Macrium creates a Linux rescue CD, runs scheduled backups, and handles bare-metal restores. The interface might look a bit technical at first, but once you get the hang of it, you’ll appreciate how much control it gives you.
Best for: Windows power users who prioritize speed and advanced features in their free HDD clone software.
Step-by-Step: How to Clone Your Hard Drive for Free
Alright, enough theory – let’s get practical. I’m going to walk you through the cloning process using one of the easiest tools, but the general steps apply to most disk cloning software for Windows 11.
Before You Start: Essential Preparation
First things first, you need to gather your tools. Here’s your checklist:
- A destination drive with enough capacity (ideally equal to or larger than your source drive)
- Connection method: SATA cables for desktops, or a USB-to-SATA adapter for laptops
- Backup of critical files (just in case – better safe than sorry)
- At least 2-3 hours of uninterrupted time (actual time varies based on drive size)
- Power supply – make sure your laptop is plugged in!
Pro tip: Before you start, run a disk check on your source drive. In Windows, open Command Prompt as administrator and type chkdsk C: /f /r (replace C: with your drive letter). This finds and fixes any errors that could cause problems during cloning.
The Cloning Process (Simplified)
- Download and Install Your Chosen SoftwareLet’s say you’ve chosen AOMEI Backupper Standard. Download it from the official website (always use official sources!), install it, and launch the program. Take a moment to familiarize yourself with the interface – it’s pretty intuitive.
- Connect Your Destination DriveIf you’re using a desktop, open your case and connect the new drive using a SATA cable. For laptops, you’ll need a USB adapter. Wait for Windows to recognize the new drive before proceeding.
- Select Clone Disk OptionIn most free disk cloning software, you’ll find a “Clone Disk” or “Disk Clone” option in the main menu. Click it. You’ll be asked to select both your source disk (the one you want to copy) and your destination disk (where everything will go).Double-check that you’ve selected the correct drives! Cloning overwrites everything on the destination disk.
- Configure Clone SettingsHere’s where you make important decisions:
- Sector-by-sector clone: Copies everything including empty space. Use this for failing drives.
- Intelligent clone: Only copies used sectors. Faster and works when cloning to smaller drives.
- 4K alignment for SSD: Always check this box if your destination is an SSD. It optimizes performance.
- Adjust partition layout: Some software lets you resize partitions during the clone.
- Start the Clone and WaitClick “Start” or “Proceed” and be patient. This is where you go make coffee, catch up on emails, or finally watch that show everyone’s been talking about. Depending on your drive size and connection speed, cloning can take anywhere from 30 minutes to several hours.A 256GB SSD typically takes 20-40 minutes. A 1TB HDD might take 2-4 hours. Don’t interrupt the process or shut down your computer!
- Verify the CloneOnce the cloning completes, don’t rush to replace your old drive yet. First, verify that the clone worked properly. Shut down your computer, swap the drives (or change the boot order in BIOS), and try booting from the cloned drive.If everything works – congratulations! Your clone is successful. Keep your original drive safe for a while, just in case.
Common Problems and How to Fix Them (Real Solutions)
Let’s talk about what can go wrong, because honestly, technology isn’t always perfect. Here are the most common issues I’ve encountered and their solutions.
Problem #1: Cloned SSD Won’t Boot
This is probably the most frustrating issue. You’ve spent hours cloning, everything seemed to work, but when you try to boot from the new drive, you get a black screen or error messages.
Solutions:
- Check your BIOS boot order. Make sure the cloned drive is set as the first boot device.
- Verify the boot mode (UEFI vs Legacy). Your cloned drive needs to use the same boot mode as the original.
- Ensure the system partition is set as active. You can do this in Disk Management.
- If you’re cloning an MBR disk to a GPT disk (or vice versa), you’ll need software that supports conversion during cloning.
- Try Windows Startup Repair. Boot from a Windows installation USB and run the repair tool.
Problem #2: Cloning Takes Forever
You started the clone yesterday, and it’s still showing 18% progress. What’s going on?
Solutions:
- If you’re using a USB 2.0 connection, that’s your bottleneck. USB 2.0 maxes out around 35 MB/s. Upgrade to USB 3.0 or use SATA directly.
- Check for bad sectors on your source drive. Run
chkdskto identify and fix them. - Switch from sector-by-sector mode to intelligent clone. Sector-by-sector copies everything including empty space.
- Close unnecessary programs that might be accessing the drive.
- Ensure your source drive is properly 4K aligned if it’s an SSD.
Problem #3: “Not Enough Space” Error
The software says your 500GB used space won’t fit on your new 500GB SSD. But the math should work, right?
Solutions:
- Your source drive might have hidden recovery partitions taking up space. Check Disk Management to see all partitions.
- Use a cloning tool that supports resizing during the clone process.
- Before cloning, clean up your source drive. Delete temp files, clear caches, uninstall unused programs.
- Use intelligent cloning mode rather than sector-by-sector.
Problem #4: Cloning a Failing Hard Drive
Your drive is making clicking sounds or showing signs of failure. Can you still clone it?
Solutions:
- Act fast – failing drives can die completely at any moment.
- Use software with bad sector skipping capability like EaseUS Disk Copy or Macrium Reflect.
- Try sector-by-sector cloning to recover as much data as possible.
- Consider using a bootable cloning environment (like Clonezilla) instead of cloning from within Windows.
- If the drive is severely failing, professional data recovery might be your only option.
Comparing Free vs. Paid Disk Cloning Software
I know what you’re thinking: “If free software is so good, why do paid versions exist?” Fair question! Let me break down what you’re actually missing with free tools.
| Feature | Free Software | Paid Software |
|---|---|---|
| Basic Disk Cloning | ✅ Full support | ✅ Full support |
| System Disk Cloning | ⚠️ Limited or with restrictions | ✅ Unrestricted |
| Technical Support | ❌ Community forums only | ✅ Priority email/phone support |
| Scheduled Backups | ❌ Usually not available | ✅ Automated scheduling |
| Incremental Backups | ⚠️ Rarely included | ✅ Yes |
| Cloud Integration | ❌ No | ✅ Often included |
| Commercial Use | ❌ Personal use only | ✅ Licensed for business |
| Advanced Features | ⚠️ Basic functionality | ✅ Encryption, compression, etc. |
The bottom line? For most home users doing occasional upgrades or backups, free disk cloning software for Windows is absolutely sufficient. You don’t need to spend $50-100 on commercial software unless you need advanced features like automated scheduling, cloud backup, or business support.
Pro Tips for Successful Disk Cloning
After years of cloning drives (both my own and others’), I’ve learned some tricks that can save you headaches:
1. Always Clone to a Larger or Equal-Sized Drive
Yes, some software can clone to smaller drives, but it’s risky. Give yourself breathing room. If your source drive is 500GB, aim for a 1TB destination. SSDs are affordable now, and you’ll thank yourself later when you’re not constantly juggling storage space.
2. Use SATA Connections When Possible
USB is convenient, especially for laptops, but SATA is faster and more reliable. If you’re working on a desktop, temporarily install the destination drive internally for cloning, then move it to its permanent location afterward.
3. Keep Your Original Drive Safe
Don’t format or repurpose your original drive immediately after cloning. Keep it as a backup for at least a week or two. If something goes wrong with the clone, you’ll be glad you waited.
4. Update Your Drivers After Cloning to an SSD
After successfully cloning to an SSD, make sure you have the latest chipset and storage drivers installed. This ensures optimal performance and compatibility, especially with NVMe drives.
5. Enable TRIM for SSDs
After cloning to an SSD, verify that TRIM is enabled. Open Command Prompt and type fsutil behavior query DisableDeleteNotify. If it returns “0”, TRIM is enabled. If it returns “1”, enable it with fsutil behavior set DisableDeleteNotify 0.
6. Document Your Process
Take screenshots or notes during your first clone. Write down which settings you used, how long it took, and any issues you encountered. Trust me, when you do this again in a year or two, you’ll appreciate having those notes.
When Should You Clone vs. When Should You Do a Clean Install?
Here’s a question I get asked all the time: should you clone your drive or start fresh with a clean Windows installation?
Clone your drive when:
- Your current system is running smoothly and you just want better hardware
- You have complex software configurations that would be painful to recreate
- Time is limited and you need to be back up and running quickly
- You’re upgrading from HDD to SSD but want to keep everything exactly as it is
- You have licensed software that’s difficult to reinstall or reactivate
Consider a clean install when:
- Your system has accumulated years of digital clutter and runs slowly
- You’re experiencing persistent software problems or corruption
- You want to upgrade to a newer version of Windows
- Malware or security concerns are present
- You’re moving to dramatically different hardware (like from Intel to AMD)
Honestly? I usually recommend cloning for convenience, then doing a clean install every 2-3 years for a fresh start. But that’s just my approach – you do what works for your situation.
Frequently Asked Questions About Free HDD Clone Software
Q: Can I clone my Windows 10 or Windows 11 system drive for free?
Yes and no. Some free disk cloning software for Windows 11 supports system drive cloning with limitations. AOMEI Backupper Standard can do it if both drives use the same partition style (MBR or GPT). Hasleo Disk Clone’s free version supports system cloning too. However, many free tools only support data disk cloning, requiring a paid upgrade for system drives.
Q: How long does it take to clone a 500GB hard drive?
It depends on several factors: connection type, drive speed, and clone method. Generally, using SATA connections with intelligent cloning (skipping empty space), expect 1-2 hours for a 500GB drive. USB 2.0 connections might take 4-6 hours. Sector-by-sector cloning takes significantly longer – potentially 3-4 hours via SATA.
Q: Will cloning transfer my Windows license?
Yes, cloning transfers everything including your Windows activation. Since you’re creating an exact copy, your license moves with it. However, if you’re replacing hardware significantly (like motherboard), Windows might ask you to reactivate. This is usually a simple process.
Q: Can I clone a larger HDD to a smaller SSD?
Absolutely, as long as the used space on your HDD is less than the SSD’s total capacity. For example, if you have a 1TB HDD with only 200GB of data, you can clone it to a 256GB SSD. Use software like AOMEI Backupper or EaseUS Partition Master that supports intelligent cloning.
Q: Do I need to format my new SSD before cloning?
No, you don’t need to format it manually. The disk cloning software will handle everything automatically. In fact, formatting beforehand doesn’t really help and just adds an extra step. Just connect the new SSD and let the software do its thing.
Q: Is disk cloning the same as disk imaging?
Not quite. Cloning creates a direct, bootable copy of your drive that you can immediately use. Imaging creates a compressed backup file that you restore later. Cloning is faster for drive-to-drive transfers, while imaging is better for long-term backups or creating multiple copies.
Q: What’s the difference between MBR and GPT, and why does it matter for cloning?
MBR (Master Boot Record) is older and works with BIOS. GPT (GUID Partition Table) is newer and required for UEFI. Some free software requires matching partition styles for system cloning. You can check your drive’s style in Disk Management. Modern computers usually use GPT.
Final Thoughts: Your Data Deserves Protection
Look, I get it. Cloning a hard drive sounds technical and maybe even a little intimidating. But here’s the truth: with today’s free HDD clone software for Windows, it’s become something anyone can do. You don’t need to be a computer expert. You just need the right tools and a little patience.
Think about Sarah from the beginning of this article – the one who lost five years of photos. Don’t be Sarah. Whether you’re upgrading to a faster SSD or simply creating a safety net for your data, taking a few hours to clone your drive could save you from devastating loss.
The software I’ve recommended today – Hasleo Disk Clone, AOMEI Backupper, Clonezilla, EaseUS Partition Master, and Macrium Reflect – these aren’t just free tools; they’re professional-grade solutions that deliver results. I’ve personally used each one multiple times with great success.
So here’s my challenge to you: don’t put this off. Pick one of these tools, follow the step-by-step guide I’ve laid out, and clone your drive this weekend. Your future self will thank you when your computer is running faster on that new SSD, or when disaster strikes and you have a perfect backup ready to go.
Remember, your data is irreplaceable. Photos from that family vacation, your thesis from college, that novel you’ve been working on – these things have value that goes way beyond dollars. Protect them now, while you still can.
Ready to get started? Pick your free disk cloning software, download it from the official source, and take control of your digital life today. You’ve got this!
“The best backup is the one you make before you need it. The best time to clone your drive is right now.”
Your Next Steps:
- Choose your preferred free disk cloning software from the options above
- Download it from the official website
- Gather your destination drive and connection cables
- Follow the step-by-step guide in this article
- Verify your clone works properly
- Keep your original drive safe as a backup
- Share this guide with friends who need to upgrade their computers!
Have questions or want to share your cloning experience? Drop a comment below – I’d love to hear how it went for you!